Friday, February 5, 2016

My Journey As A Scroll Saw Pattern Designer #1692: Friday Came Quickly This Week!

With another week coming to a close, it is (once again!) amazing how quickly time seems to pass. Again this week was extremely busy, and my status of being ‘caught up’ was very short-lived. Being on top of all my orders lasted about six hours, and soon I had more orders to fill. I was thrilled with this, as it is what I have been working towards for many, many years. It is just sometimes hard to keep up.


I have always had the mindset of getting things out as quickly as I possibly can. As one who is a 'customer’ many times, I know the feeling of waiting for something I ordered and while the anticipation can be part of the 'fun’, it is thrilling when I have new supplies waiting for me at the post office. 


With that in mind, I try my best to fill orders quickly. Often I cut 'extras’ when something is ordered – especially when it is something that I anticipate will be sold quickly. In checking my numbers, I have sold over 110 dozen of my SLDPK129 Elegant Bevel Cut 2-piece ornaments since the new year. Unlike my 1/8" ornaments, these cannot be stack cut. Each one has an angle-cut center as well and I rout them and sand them smooth. In anyone’s book, that is a lot of cutting. 


I have done some design work in between cutting, like my Three Victorian Cone project lesson and video that is now available at Toletown. 


I encourage both my painting and woodworker followers to go over there and check things out. It is a wonderful online community that is great for ALL levels of painting – especially newbies. You never know what techniques you may pick up that you can apply to your other crafts. Even if you are not a 'painter’ per se, I think you would enjoy it. 


Yesterday I spent the day cutting another large batch of ornaments and two of the large clock pieces that I used for this beautiful Lynne Andrews design called “Christmas Time”:


I enlarged the wood piece to 16" in diameter and I absolutely love it. Like the smaller ornaments, it is in separate pieces with each section cut on a bevel to give the piece some interest and depth:


I really think it made an impressive difference.  (You can get the wood kit from me here: SLDPK128 Large Timepiece Wood Kit)


I am already planning my next design on this surface. It is going to be really cool, I think! ;) 


I have so many wonderful ideas to play with! I can’t wait to get to them! 


For this weekend, I have another cool idea for Easter that I think people will like. I actually caught up (again) with my orders and I cut a couple of extra ornaament sets on top of what was ordered so I can spend the weekend designing. It was a long day yesterday, but a good one, as I spent the afternoon and evening working at the saw. I think about a lot when I am cutting. Usually that is my best time to think through the next ideas that I have. I have my headphones playing my favorite music and I am in another world. What a great 'job’ I have. 


I decided to pack up the orders last night as well and they are sitting near the door waiting to be brought to the post office today. I had my “helper” Pancakes who stayed with me the entire night:


Isn’t he handsome?  I think he had his 'travelling shoes’ on! ;) 


Most of the time, I wait to pack them up until morning, but it seems that takes a good part of time lately and I feel much better having it done before I go to bed. It makes for late nights, but it is worth it to wake up without having to do it before I run out the door. I am surprised at the difference it makes. It also felt good to actually package everything up, knowing that those who receive them are getting something that was made with care and pride. Sometimes my customers are worried about things taking longer to receive from me here in Canada, but I do believe once they get the items, they feel the time was worth it. I try to make it known how much I appreciate them coming to me, and I hope it shows in my work. It makes my job so nice to know who is receiving the things I create. 


So off we are to begin another weekend. It has been so rainy and 'blah’ outside lately. What an odd winter we are having. The bit of snow we received last week is all replaced with mud and rain. I hope that this means that the summer will be coming sooner than last year. It seemed that we never really got many good, hot days. Once again, I hope to get away to the beach for a time and bring some form of artwork. I always plan and sometimes it is hard to follow through with things. I am more determined than ever though and I hope I can really make it happen. 


I wish you all a great weekend. Hopefully I will have some more fun things to show you next week. I am excited about today and being able to work on them. It is going to be fun. 


Have a safe and fun time and remember to relax and enjoy your life. 


Happy Friday to you all!


via Tumblr http://davidpires578.tumblr.com/post/138729368164

Thursday, February 4, 2016

My Journey As A Scroll Saw Pattern Designer #1691: Making Progress and Catching Up

After Monday night’s power outage, things got back to normal rather quickly. I spent the next day finishing up the outstanding orders that I had and getting everything boxed up and ready to ship out the door. I worked at a very relaxed pace and enjoyed packaging everything up. Among the orders was another one of my SLDPK238 Halloween Haunted Carousel kits, which is one of my favorite things to sell. I think of the people who are receiving the items and I really do take a lot of care and pride in the quality of what I am providing them. It was a good night. 


By the time I was finished, it was nearly midnight. I couldn’t believe how quickly the time passed for the evening. Keith was at his mom’s for the night and it was just me and the cats and some nice classical music. I felt happy and accomplished when I  sat down to unwind. 


As you can imagine, it took a little time to settle down. I played a bit on the computer and visited with some friends through chatting. One good thing about living in the Atlantic time zone is that when it is late here, it is earlier where many of my friends live, so there always seems to be someone up and about no matter what the hour. Many of my friends are ‘night owls’ too, and it is always nice to catch up with them after a busy day. 


Around 2am I was finally sleepy enough to go to bed. As I was tending to the cats for the last time of the evening and once again, the power went out.  


While I was heading to bed anyway, I didn’t think that things would affect me very much. But the night was rough. The cats were crazy. It was very cold and dark, and the power kept returning and shutting off again, waking me up several times. 


Long story short, we didn’t have power until after 8am. I was so exhausted from being up all night I want back to sleep until 11am – unheard of for me. 


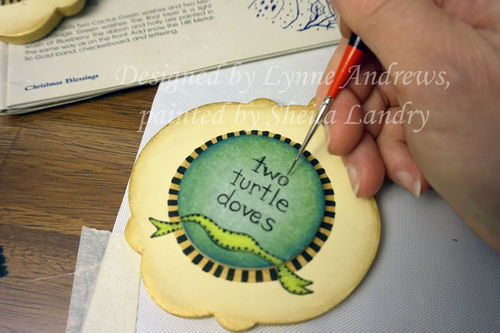
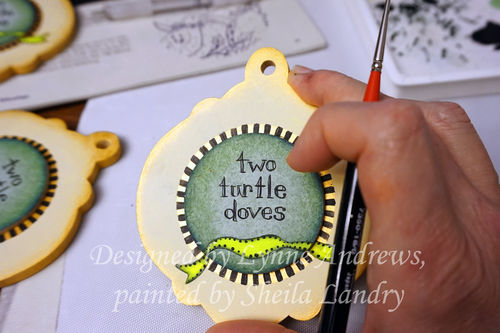
My day was short and I was moving slow, so I kept things rather low key. I was able to work on my “Day 2” of my “12 Days of Christmas” ornaments and make some progress. They looked pretty good in the daylight. (I was slightly worried after painting in the dark the day before)


I am on to the hand lettering of them, and hopefully will finish this batch over the weekend and have them in the mail by Monday. Today I am cutting more ornaments for customers. It will be a good day. 


I am keeping this short today so I can get moving. The power was flickering again last night so I hope it stays on today. I really need to get work done on these. :) 


Happy Thursday to you all! 


via Tumblr http://davidpires578.tumblr.com/post/138669814089

Wednesday, February 3, 2016

Site is titled "wood

Site is titled “woodworking for engineers.” Not only has some of the coolest furniture plans, but also shows you how to build the coolest gadgets out of wood. Great find!

via Tumblr http://davidpires578.tumblr.com/post/138643362524

A Ming-Inspired Cabinet (30)

Post 30 in a continuing series…

———————

While the posts connect to the long side inverted ’T’ beams by way of a tiny 5mm square peg, the beams themselves connect through to the above-mounted cornice assembly directly, using hammer-headed draw bars. I had previously mortised for these drawbars and their associated fixing pins only on the short side inverted ’T’ beams, however I realized it would be better to double those connections up at each corner-  thus the long side inverted ’T’ beams needed to be mortised for both draw bar and fixing pin:


You can just see in the above photo that the fixing pin mortise has been filled with a sacrificial piece to preclude blowout when mortising cross-wise for the draw bar.

The sacrificial pins were tapped out afterwards using a metal drift pin:


Setting the inverted ’T’ beams aside, at last I can deal with the stretchers. I decided it would be prudent to make up some pieces to gauge the spacing for the stretchers, since, after so many cut out steps, it was likely that there would not be perfect fidelity to the layout established in the drawings.

Here, the legs have been clamped down tight and the test pieces fitted:


 As it turns out, the lengths were very close to the target numbers, as were the bevels, save for one corner which was slightly out for some reason.

As the posts slope both ways, none of the cut lines on the stretcher shoulders are 90˚. With the bevel on the broad face of the stretcher the angle is all too apparent, however on the narrower edge of the same stick the cut angle is only at hair off of 90˚, at all of 89. 85˚ or so:


This splay-posted structure is one of the more complicated ones I have done, simply due to the fact that the splay is so slight that many of the angles are just very slightly off of what they would be if the posts did not slope at all.

Another view:


The following picture shows well, I think, that even though the angle of 89.85/0.15˚ is a very slight slope, it counts for something. The bevel gauge is flipped around to show double the effective angle, relative to the fence:


Now working on the tenon cuts on the long stretchers:


To cut each tenon, 4 separate set ups are required:


This one is about halfway along:


The larger bandsaw was used to rip the tenon waste:


After roughing out, the tenons on the long pieces looked like this:


Then on to the router table to clean up the surfaces and bring them to dimension. The cuts off the bandsaw are fairly close to the line, so the amount of router work is minimal, which is the way router bits cut the best:


After routing:


Then, working again on the short stretchers, a second check to see that I am in the ballpark for length, shoulder to shoulder:


The tenons are then further cleaned up, and slight adjustments made, using various chisels:


 This tenon is complete:


After the tenons are done, then they must be fitted to their mortises, which seems to take a while. Here, first short side stretcher is fitted up:


A closer look at one shoulder:


And the other:


Maybe a closer look wouldn’t hurt:


On the exit face:


A while later, the second short stretcher was fitted:


Then it was time to work on the long stretchers again - here, I’m checking the shoulder-to-shoulder lengths before final clean up:


The parts can hang in place simply by friction on the side shoulders.

I cleaned up the tenons on those two long stretchers, and that is as far as I got today. The remainder of the stretchers could be fitted up tomorrow, however perhaps my optimism is premature in that regard. They’ll be done when they’re done.

Thanks so much for dropping by and checking out the comings and goings here. I hope you’ll return for the next installment.

via Tumblr http://davidpires578.tumblr.com/post/138635909329

Tuesday, February 2, 2016

My Journey As A Scroll Saw Pattern Designer #1690: Somewhere in Time

Yesterday was another full and busy day. We hadn’t planned on doing our update until mid-week, but we were as ready as we were going to get so we thought it would be time. Keith’s job in updating is getting all the new products up on the site. Besides posting them, he cross links them to other similar products and makes everything look nice and consistent. He really is the one that makes our site look good. 


As for me – my job is to write the newsletter. You all know that I like to write and while sometimes I feel the newsletter is somewhat redundant because I am reiterating things that I write here in my blog, I do realize that our newsletter reaches a much larger audience and I kind of condense the two weeks or so of activity into one short mailing. It isn’t too hard to do really, but it takes a little time. 


Between that and getting the regular mail done for orders, it brought me well into the afternoon. Add to that the daily tasks of answering questions and emails and it was just about dinner time before I could sit down and take a breath. 


It was a good day, but I had so wanted to paint and work on my Day 2 of Lynne Andrews’ 12 Days of Christmas ornaments. After all, I started the group to make them and I have barely had time to paint my own. I WAS going to keep moving ahead to get them done. Really.


As I gathered all of my painting supplies and arranged my table for painting, I felt good about the day. I accomplished quite a bit and I looked forward to a relaxing and productive evening of painting. My goal is to get these out the first week of each month (I am making six sets and sending five to other recipients throughout the year) and I knew I had to get moving in order to keep on schedule. January was crazy busy and I had very little time to work on them. So the time was NOW.


… or WAS it??


As I literally went to touch that first bit of paint from my brush to the first ornament, everything went black.  Seriously. The computers shut down. The refrigerator stopped. Of course, there were no lights. No power whatsoever.


We live in the country and there wasn’t even any moonlight at that point. It was so dark that it was as if I had my eyes closed tightly. I couldn’t even see shadows or anything at all.  


I worked my way to the cabinet where we kept candles and fumbled my way to the drawer where we had the barbecue lighter. The candles lit our little place enough to see what was around us, and Keith called the power company to see what was up, as he just happened to have his mom’s phone. The news wasn’t good. Something big blew and 3000 people would be without power for what they thought would be about three hours.  (Remember – I live in the country. Three thousand people is a widespread ares here.) 


So “poopie”. 


But then I remembered we also had an oil lamp. It was a small one, but did give off somewhat effective light. I dug it out from the back of the cupboard and lit it up. Yes! It would work!  I brought it to my painting table and decided that it was enough light to paint by. 

It kind of looks a bit romantic, doesn’t it??


Fortunately I had one of the six pieces done, as I like to finish one up first to make sure I am on the right track and then I complete the other five. So there was no issues of guessing if my colors would be correct.  Since I have been working with DecoArt paints for many, many years, I also knew what the colors would look like  - even in the semi-darkness. I forged on …


Keith got ‘antsy’ and wound up taking a drive to Yarmouth. I had already donned my jammies, as I wanted to relax while I painted.  I was amazed at how much the time flew and also how much I got done. I probably made more progress than if I had power, as I didnt’ go to answer emails or check my computer every few minutes. It was a good night. 


While I painted, my mind wandered to many things.  It made me think of those painters from generations past and how they only had candles and oil lamps for lighting in the evenings. Are we to think that they only painted in daylight?  I don’t think so. 


We are so spoiled with things like “Ott Lights” and fancy lighting. It made me think of the masterpieces that came from those who didn’t have the fancy equipment, supplies, and lighting. Just think of the conditions those masterpieces were created in! :) 


I was happy when the power came back on about three hours later, but I didn’t really mind the 'hiccup’ that we had. I like the quiet and as much as I like music, there are times when I find it is just nice to 'be’ without any additional input from outside. This includes phones, computers and other sources. 


We live in a world filled with information. Right now as I type this post, I have five tabs open on my Chrome browser and I am watching my email and some other things that need watching. We 'multi-task’ daily without even realizing it. No wonder we feel so frazzled and tired some days. 


We hear that out of adversity we learn things. While a three hour power outage isn’t the end of the world, it did remind me that there are times when we should just 'be’. The 'freeing’ feeling of unplugging and stepping away from communication with the world for a short time is not only beneficial, but I believe necessary for our good health and a positive attitude. 


I need to do it more often. 


I wish you all a wonderful Tuesday! I hope you remember to take care of yourself and your own well-being.  


via Tumblr http://davidpires578.tumblr.com/post/138543614759

Monday, February 1, 2016

A Ming-Inspired Cabinet (29)

Post 29 in a continuing series.

—————-

I recently learned that some links were absent from the ‘Ming Inspiration’ series of posts from 2009~2010, a 50-post build detailing the construction of a bubinga dining table. Anyone reading the series would find no continuing link on post 6, and that might give the impression that the table was never actually built. Well, the link has now been fixed, and the remainder of posts checked out, so if you tried to read that series at some point in the past and didn’t get past post 6, the course is now clear.

—————-

Continuing on with the cabinet build. Where I last left off with the photos, the tenons on the support stand legs had been rough cut in one axis. Well, a few steps later, the stepped tenons were completed:


Another view:


Then 8 legs were finished to the same point:


I used the sliding table saw to execute the tenon cutting, with some slight adjustments and trimming required afterwards with a chisel:


Then the mortises could be laid out for the stretcher tenons:


I figured out a way to peg this connection, and you can see the tiny 5mm square mortises in the photos.

The connection here is a pair of pegged tenons,  which look to be half-lapped but in fact the proportions work out so that the tenon size is actually slightly less than half - those readers familiar with Japanese practice in mortise and tenon joinery with splayed post structures will understand the technical reasons why the tenons are sized as they are, which in fact; given the shouldering on both ends, is the maximum possible size:


For more information on the intricacies of splayed post mortise and tenon work, take a look in any standard Japanese carpentry Layout text, or my own series, The Art of Japanese Carpentry Drawing, Volume 4, where this is explained in great detail.

The layout took a while to complete, and then it was on to punching out the 5x5mm mortises with the hollow chisel mortiser:


Peg mortises done, and, oh yeah, the mortises themselves as well:


The inside faces receive haunched tenons, and here I’m cleaning out an end grain wall to the correct slope:


I am loving these new Kamon chisels.

All eight legs through to the same stage:


Another view:


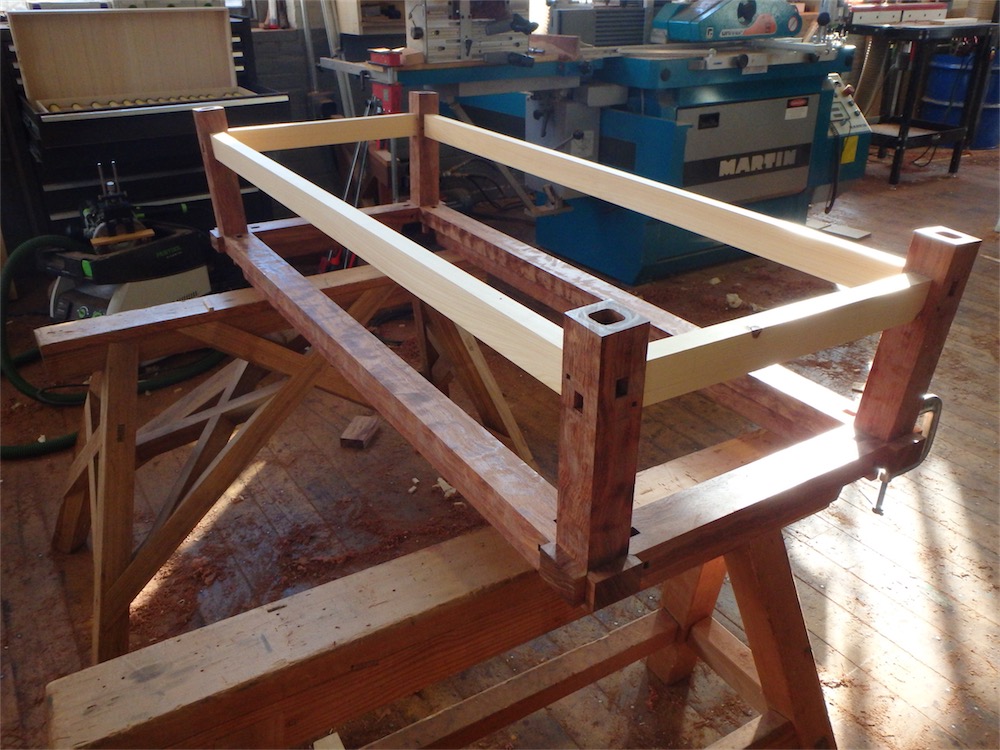
After that, the legs are fitted to the inverted ’T’ beams:


The stepped tenon shoulder on each tenon sits slightly below the receiving member’s lap surface, to accommodate seasonal movement:


Another view:


Once all the legs were fitted, the associated peg mortises were scribed through to the tenons, leaving the peg mortising on the tenons for another day. That day would be tomorrow come to think of it.

Thanks for visiting the Carpentry Way.

via Tumblr http://davidpires578.tumblr.com/post/138511549679

My Journey As A Scroll Saw Pattern Designer #1689: Welcome February!

It is hard to believe that the first month of the year is under our belts already. It seems like it was just December only a few days ago! Here in Nova Scotia, we have been (so far!) spared the fierce winter that we have become used to experiencing. Oh – we have had some snow, but it is nothing like what we experienced last year where we had storm after storm. I remember driving to Halifax at the end of April and still seeing small, stubborn piles of snow that did not want to seem to die. It was a brutal year for sure. 


But so far, both our autumn and winter seasons have been mild. I am hoping that will mean that we will have a decent spring and summer as well. While I certainly don’t think we will escape winter completely, we sure have been fortunate so far in dodging a storm or two! 


The weekend also went by very quickly. I had several deadlines to meet and it seems that I just made it under the wire for them. Some of them were self-imposed and others were for commitments that I had made for designing. I wonder why I always wind up hanging on to those last seconds as I am completing these types of tasks. I don’t do it on purpose, but as things come up and my schedule changes, I tend to shuffle things and change my priorities and take care of things that need to be done “first”. There is no such thing as a hard and fast schedule for me. I don’t think that is all bad, though, as I do think that being flexible is the only way to survive as an independent designer. You have to learn to go with the flow…


I am happy to say though that I not only finished my project that I was working on for Toletown, but I also was able to make a couple of short videos with some painting and woodworking techniques. The finished project for Toletown is a group of three Victorian cones made from Roc-Lon fabric. They are fun, easy and beautiful to create:


I am really pleased with the beautiful, deep colors and my video (available at Toletown throughout the month of February) shows exactly how I achieved these bright and vivid colors using DecoArt paint and mediums. You can see the options of joining Toletown here (http://www.toletown.com/membership/)  It is economical and very much worth the cost. The membership includes two full classes per month (with videos to accompany them) and a ‘Quick Paint’ packet, as well as the many other features of the site. I really spent a lot of time making this packet so it would be easy to understand to even new painters. I included over 50 color step-by-step photos so that even those new to painting can quickly and easily follow along. It was fun to create and I hope everyone likes it. 


I also created a video showing how to glue my SLDPK129 Elegant Bevel-Cut ornaments together for the “12 Days” Facebook Group that we formed. Many of the ladies haven’t seen ornaments such as this and I thought showing a short video would be appropriate.  It also applies to ANY of the self-framing ornaments, plaques or candle trays that I design so it is a great resource for woodworkers as well. You can view the video here on my YouTube channel:


Gluing Bevel Cut Ornaments


I hope everyone likes it, although I was a bit rusty with filming. 


Today is the start of the new week and a day for me to tie up some more loose ends. While my immediate deadlines have been met, I still have some orders to get out and some personal deadlines as well. We are also planning a site update in the next day or so, so please stay tuned for that. 


The year is off to a busy start, with no slowing down in site. It is a wonderful place to be though and I am so thrilled for all that lies ahead. I wish you all a wonderful start to your week as well. May you find happiness in doing something positive and creative! 


Happy Monday to you all! 


via Tumblr http://davidpires578.tumblr.com/post/138479182759