Thursday, June 23, 2016

How to Pin Recipes f

How to Pin Recipes from Cook'n

via Tumblr http://davidpires578.tumblr.com/post/146354682669

Tuesday, June 21, 2016

Blonde and Cupcakes:

Blonde and Cupcakes: DIY Home Decor Ideas: On A Budget

via Tumblr http://davidpires578.tumblr.com/post/146293725044

Monday, June 20, 2016

A Ming-Inspired Cabinet (63)

First off a photo which got lost in the shuffle of the previous post, showing the double tenons on the drawer runners:


I mortised the drawer fronts using the Zimmermann mill, and squared up the 3/16" x 3/8" (4.75mm x 9.52mm) mortises afterward:


 Here’s a pair completed on one side, as far as those runner mortises go:


In it goes, test fitting as each mortise is completed:


Together:


The drawer fronts are relieved in their center section, but only roughly at this stage.

The idea here was that the runner would be flush to the corner of the drawer front:


The outcome was what I had desired.

Later, the bottom edge of the drawer front will be reduced by a few shavings, so that the drawer runs on the runners alone, and the drawer’s lower edge does not rub on the casework. Any end grain trimming on the drawer front will be matched by taking a near-equivalent reduction off off the runner edge.

You can run(ner) but you can’t hide - isn’t that what they say?:


Double trouble - or is it just a case of double vision?:


Let’s see how this contraption fits the case:


I was pleased with the way they fitted in, which was hitch-free.

Even though the drawer fronts themselves are a hair too tight for their openings at present, I thought it would be worth a look-see anyhow:


Can’t wait to get those seated back in there. The drawer rail and stile framing will be proud of the fronts by 5~6mm or so, so there should be some pleasing shadow lines.

All for this posting - hope you enjoyed. Thanks for visiting!

via Tumblr http://davidpires578.tumblr.com/post/146230544559

My Journey As A Creative Designer - Woodworking and Beyond #1742: The Move is ON!

It is funny how something that has been a habit so long can fall out of being a habit so quickly. In the past couple of weeks, so many habits that I have acquired over time have been greatly altered. I expect it will be like that for the next few weeks, as we received the KEYS to our new place and are going to finally be able to start moving things there! How exciting this is for us!


I am filled with a wide range of emotions right now. I go from being excited and happy to being completely overwhelmed. For any of you who know me at all, you know that I love keeping stuff in order. Seeing the piles grow here in our little place as we prepare to move can feel a bit overwelming. Add to that we are just beginning this journey and things will get quite a bit worse before they get better. There is just no way around it. So I am learning to not worry about what is in front of me now and not look at everything all at once and know in my heart that it will all be “OK”. :) 


So again – I will be on away from blogging for a while. I will pop in as much as I can to update everyone, but for now, my priorities have to be with the task at hand. After all – it is for the ‘Greater Good’ of us all. This is where patience comes into play. A test, if you will … .


With that said, we did manage to update the site this weekend. 


Here is a quick rundown of what is new on the site:


Keith has three new plaques that are just wonderful. His first is SLDK677 - Love Gives us a Fairytale:


The next is a fun and whimsical plaque for the kitchen (SLDK676 - I Cook With Wine):


And finally, his SLDK675 - Our Love Story Plaque pattern – a great pattern you can personalize with the optional add-on section. (The personalization can be done by Keith for an extra cost – but the lettering is included in the pattern for you to do it yourself.)  


All three of these patterns are already showing to be quite popular. :) 


For myself, I finally was able to launch my SLDE Sheila Landry Designs Elements series that I had shown hints of earlier. I don’t know if it was the best time to do so, when I am so pulled in so many directions, but I feel as if I haven’t had anything new for quite a while and I really am excited about the possibilities of how this will work. The first three patterns are shown here:


These are the SLDEBI01 - Robins, SLDEFL01 - Crocuses and the SLDEFR01 -Basic Frames. The photo shows how well they work together. I am offering a free “Introduction Sheet” that explains them a bit more that  you can download HERE.


You can read about them on their descriptions and on the introduction sheet. 


Finally, I want my painting followers to know that I got my shipment of beautiful metal snowflake charms! I put a product on  my site for them and plan to add in more wonderful embellishments soon that you can use with your painting or craft projects. I used my charms on my SLDPK134 Snowflake Beveled Plaque along with a wonderful Lynne Andrews pattern from her “12 Days of Christmas” book – Christmas Blessings.  You can get the charms here: EMB01 - Metal Snowflake Charms. 


I think they look FABULOUS! :D


Well – that is about all I have time for today. I have to get moving – literally! 


I promise to be back in full swing soon. Just as soon as time will allow. 


I will keep you posted on what we are up to as much as possible. Until then, have a wonderful week full of creativity! 


via Tumblr http://davidpires578.tumblr.com/post/146207862594

Sunday, June 19, 2016

Check out the tutori

Check out the tutorial: #DIY #Rustic Shelves #crafts #homedecor

via Tumblr http://davidpires578.tumblr.com/post/146182751364

Thursday, June 16, 2016

A Ming-Inspired Cabinet (62)

When I left off last post, I had managed to assemble the sliding door frames and fit the lattice panels. Subsequently, I have fitted the shedua back panels to the same doors:


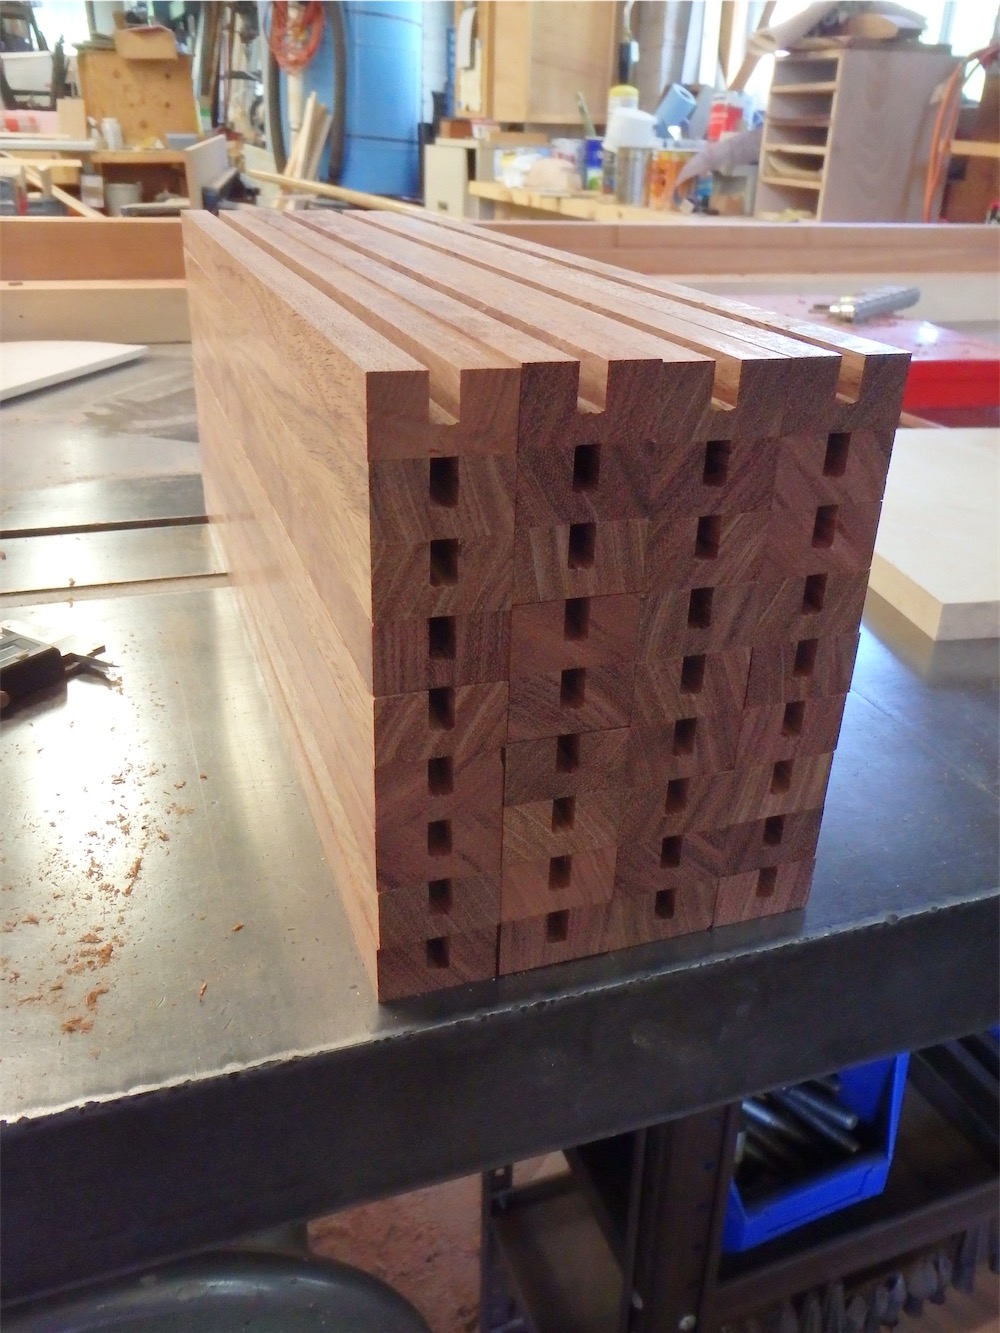
Another view:


I like the combo of shedua and bubinga.

Both cabinets were advanced to the same point. These sliding door units are simply dry-assembled for the time being. I plan to apply finish to the door frames, but not to the lattice, which I will simply wax. Wax is hardly a tough finish, but the lattice sees next to no wear so it is reasonable I think.

I set that finishing work aside however, and proceeded with work on the drawers. The drawer fronts are shedua, and will have a portion of the face relieved back. I did some rough cutting in that regard on the mill. The fronts are currently about 0.06" oversize, but shedua is so prone to tear out, even with the mill used for cutting (which I used, as shown earlier, to take the fronts down from 1.125 to 0.95" thickness) that I will take the fronts to a local place to get that last bit taken down on a wide belt sander. That’s scheduled for tomorrow. I’ll also be taking the curly bubinga main door panels down to have them slimmed a bit as well.

Drawer fronts set aside for the moment, I turned my attention to the drawer runners. Readers who checked out the ‘Square Deal’ series of posts may recall some of the details concerning a nearly glue-less version of an NK drawer that I did for the side table. I was initially planning to construct these drawers, 18 in total, with the same design execution, which employed through tenons from the drawer sides - tenons which of course are visible on the drawer fronts.

After further rumination, I decided that it might look a bit too busy with all the drawers having exposed through tenons, so I revised the design slightly, changing to blind tenons. This has had some positive effects in other areas, however it does mean I’ll be using a bit more glue than otherwise. That’s a drawback, however on the flip side, by using blind tenons and hide glue, the construction will be much more readily taken apart if repairs become necessary years down the line.

I’m getting perilously low on bubinga. I have a little figured material left, but the straight grained stock has been completely used up. The last of it managed to yield enough for the drawer runners, but only barely. A total of 36 runners are required, two per drawer, and that was exactly what I managed to squeeze out from stock, with not one single spare piece. That put a bit of pressure on as far as cut out work on the runners, as I could not afford to make any mistakes.

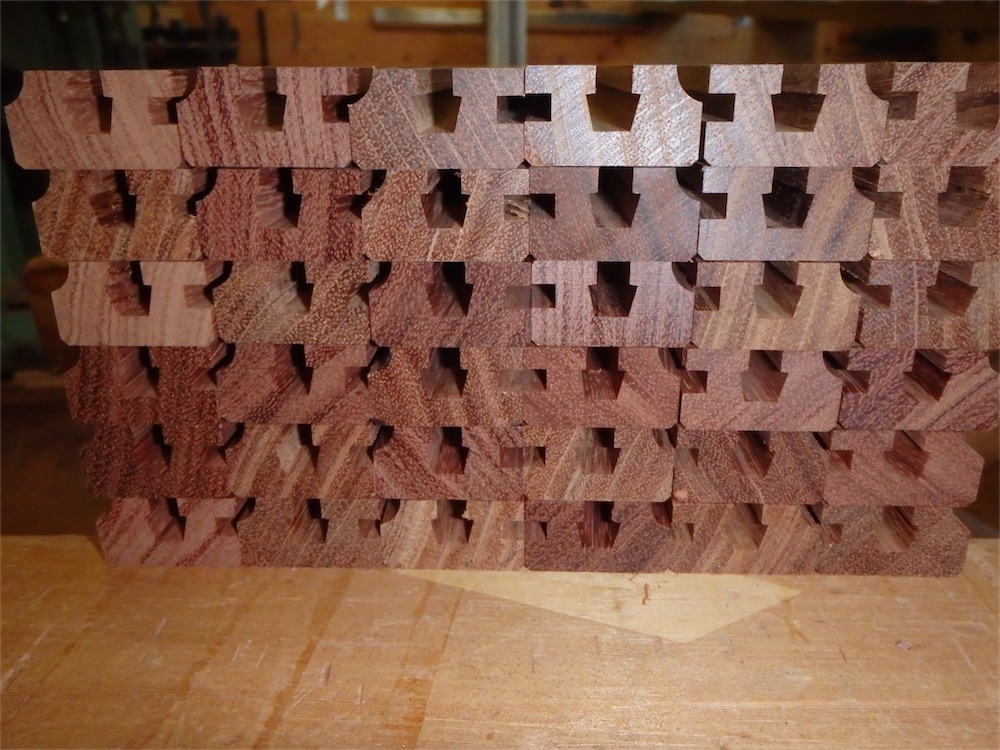
Here are the 36 runners, after having been jointed, re-sawn, re-jointed, planed, trimmed to length, finish planed to dimension, and kerfed, a process taking a couple of days:


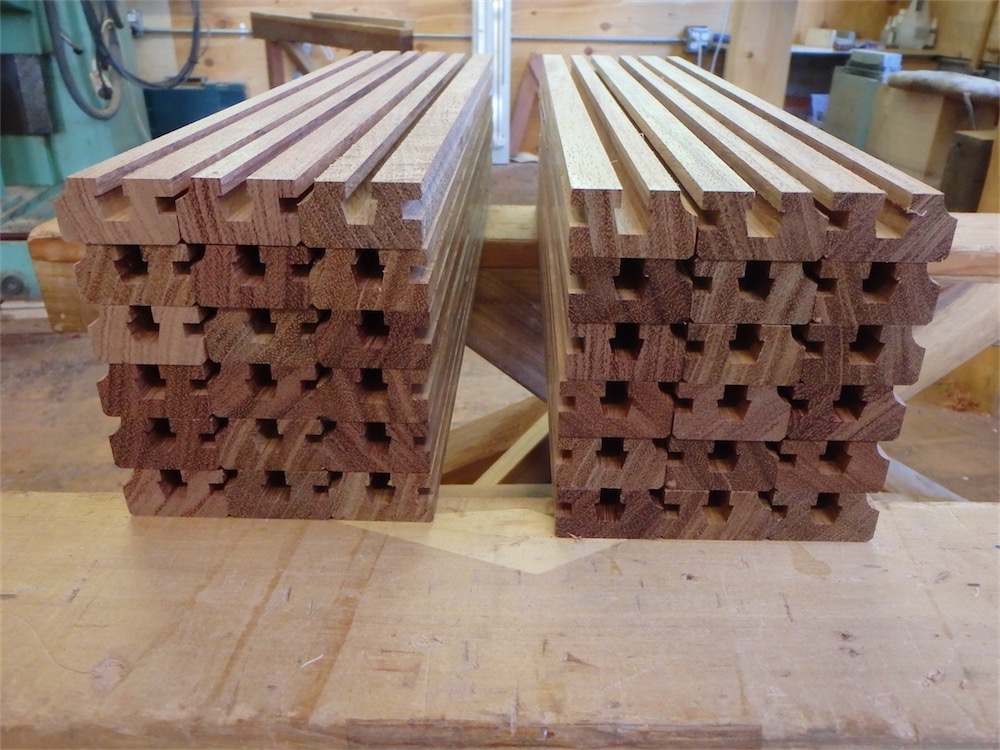
That was how the pile sat after mid-morning. By the end of the day they were done, and a big sigh of relief at the end as all the cut out steps went without a hitch. Here’s the pile now:


These have been trenched for sliding hammer head tenons, grooved for the floor panels, chamfered, and a hollow molding pass also taken. The above shows the back ends of the runners; the ends which connects to the drawer fronts have had twin tenons formed on them, and somehow I accidentally deleted that picture from my camera when uploading to my computer. I’ll show the tenoned ends next time.

Another view:


I will need to obtain some more bubinga soon for the drawer sides and backs, and that hunt is currently underway. Happy to accept donations by the way….

I also took the opportunity this afternoon to bring the VG back panels down to a hair over target dimension:


It’s not everyday one has the opportunity to plane quartersawn material in this sort of width. These panels had been roughed out a couple of months back, and after sitting for the interim have remained totally flat. Nice not to have any untoward surprises in that regard.

After planing, the panels were left to rest:


I expect they will stay flat.

Another view - only the left hand panel is a glue up, the remainder of panels are one-piece:


The glued-up panel will not be visible in the completed cabinet, as it sits behind the bank of drawers. And a single glue up is not the end of the world, now is it? I didn’t even remember/notice that it was a glue up until looking at these very pictures.

Thanks for dropping by on your travels today. Comments always welcome.

via Tumblr http://davidpires578.tumblr.com/post/146033034019

Monday, June 13, 2016

A Ming-Inspired Cabinet (61)

Trucking right along with the work on the upper sliding doors with matsu-kawa-hishi latticework.


After beading and profiling the door frame fronts, and completing the rebates on the rails, I used the scraping plane to do a little clean up:


Here I’ve done a test fit of two (temporarily assembled) door frames to see how they fit into the cabinet:


It was a nice moment in my day to find the frames fitting as planned.

Same was then done with cabinet #2:


Then the frames were removed and the lattice assemblies scribed to them. That was followed by completion of that layout, and then chopping of spear-point housings:


Here’s a test fitting of the end of the lattice into the stile housings:


Seems to go together okay:


I later placed a backing piece in the dado to ensure that the lattice, after fitting, left room for the shedua panel which will be fitted soon enough:


A bit of time went by and eventually I had the first frame and lattice assembly together. It seemed an idea to see how it looked in place:


Me like! The lattice has some backing strips fitted to the groove behind to keep it in place.

A while afterwards, assembly #2 was in:


A closer look - the door stiles in the middle overlap one another slightly too much at this point because the tenons and end grain of the tongues sticks out a 1/16" or so still:


A view of the two doors side by side so you can see the modest amount of clearance between the two:


The outer door is not sitting all the way down in it’s groove. The fit is a hair tight at this juncture.

A look at some areas of intersection between lattice and frame:


The lattice assemblies will need a thorough going-over to clean up the odd mark here and there and apply some slight chamfering, a task that will undoubtedly be on the tedious side.

All for this round. Thanks for visiting the Carpentry Way.


via Tumblr http://davidpires578.tumblr.com/post/145879535039