This year’s repair work at the Kyo no Machiya, located inside the Boston Children’s Museum, is to replace the sliding door track, or shiki-i, and the frames of four paneled doors, ita-do. The track was worn to the point where the dadoes for the sliding doors were all but indistinct, and the doors themselves had worn their lower stiles to the point where there were no longer tongues with which to engage the sliding track. The doors, effectively reduced in height and sitting in an opening with a larger than original height, were perilously close to falling out of their openings entirely.
My first visit was to come and collect the doors and take a look at how easily removable the shiki-i might be. Unfortunately, I found that the lower sliding track was not going to be easy to remove. By design, they should be, however in this case the floor framing of the closet space in behind the track had been nailed to the track with some fairly large spikes. The floor of the closet, 10mm plywood, was also trapped by the 3mm plywood covering the walls of the closet. Taking the floor of the closet out to get at the framing would open up a large kettle of fish, and mean the stairs also would have to come out, so I will instead elect to chop the track out in sections.
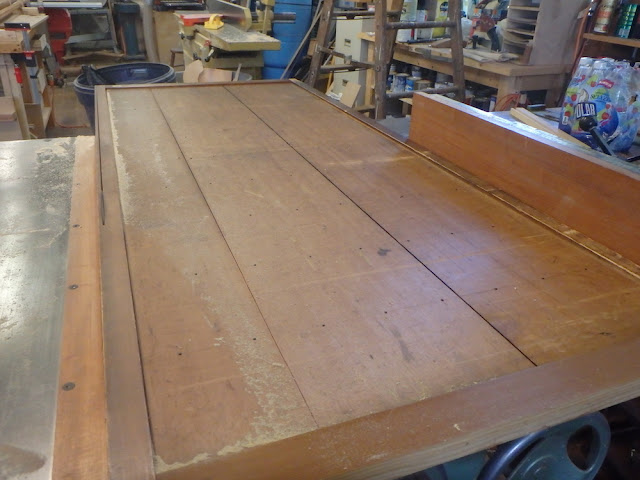
Here’s the track in question:
The sliding doors in this area are normally kept shut as they provide access to the second floor of the house, and that is an area not open to the public. A tea ceremony group uses the upstairs space on an intermittent basis.
Back at the ranch, I got to work removing the ita-do frames. Upon inspection, I discovered that one stile on each door had been replaced at some point in the past - likely at the time when the building was installed at the BCM, and the new stiles did not show through tenons from the door battens, as the old ones did. The lower rails were also non-original. A bit more investigation revealed the unpleasant fact that the new stiles had been affixed with an aliphatic (yellow) glue, and thus the joinery could not be knocked apart. Therefore, I had no option but to cut the doors apart, taking care to preserve whatever was left of the tenons on the door battens.
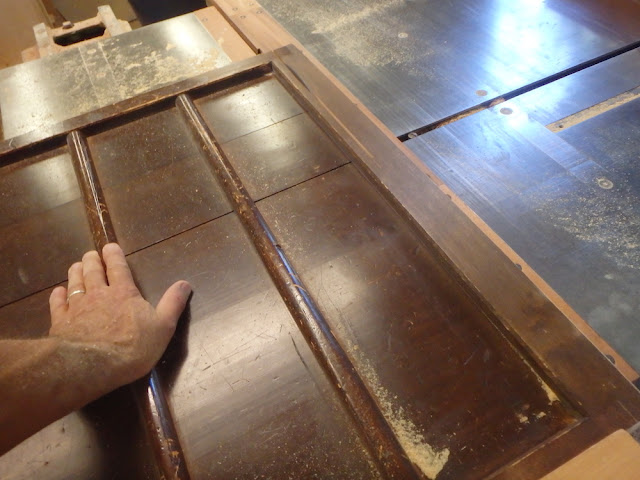
My first pass by the post was to rip the stile on the table saw:
These rip cuts revealed the ends of the mortises in the stiles:
I then cross cut the door rails, removing 2/3:
Then, at each joint location, I sawed around the connection thusly:
A few chisel blows removed waste:
This was not a quick and easy process by any means - it felt a bit like an archaeological dig:
The old stiles could be more or less knocked off their connections, however I decided to kerf around some of the joints just to minimize stress on the small batten tenons when the rails was knocked off:
The old stiles came off in one piece:
The new stiles came off in 30 or 40 pieces each. Amazing what the consequences of glue choice can be, huh? Easy repairability, as it traditional with the use of weak adhesives made from rice paste or similar, or stuff that has to be chopped to bits, when modern adhesives are employed. Sometimes it is great to have adhesives that are stronger than the wood itself and people do like to boast about stuff like that - but it’s not such a fine thing if repair of those assemblies is envisioned in the future. Modern high-strength adhesives do pair well with today’s throw-away culture.
Once I had the stiles off and had chiseled off most of the old glue from the tenons, I took a measure of some of the battens, shoulder to shoulder:
The numbers were not exactly the same from batten to batten, varying by 0.4mm or so, but this number is representative:
When at site I had measured the post interval, inside face to inside face, so having the batten length dimension (i.e., same as the measure between inside faces of the stiles) in hand now allowed me to calculate the correct door widths and stile widths. Once that was done I discovered that the old door stiles had been undersized, at 36mm width, when they should actually have been 38mm. Possibly the stiles may originally have been 38mm wide, and had been modified over time to fit posts when had shifted out of plumb as the building settled over time. I’m just guessing though.
Unfortunately, whoever fitted the replacement stiles in the past had not taken the time to calculate the correct size needed and had simply duplicated the old stile size, so the old doors ended up being too narrow by some 4mm each. Since their fit was so poor in the wall opening due to excessive wear, the issue with incorrect overlap was not, of course, presenting itself too overtly.
I discovered that when the door had been worked on previously to fit the new stiles, they had broken off a few tenons and had redone the connections with a nail:
Not the best way to do things obviously, but I do not know the circumstances of the past repair so I will hold off commenting further.
At last, all four batten and panel assemblies were free of their frames:
I have three batten tenons broken or missing, and will have to either fit inserted tenons or fabricate at least one new batten. I’ll cross that bridge when I get there.
Time to make some new frames, which I decided to make from old growth Port Orford Cedar. Step one was to crosscut the material to length, and then on to jointing:
And then planing:
Then resawing:
And more jointing and planing after that.
Nearly there:
One of the pieces I started with proved to have some internal stresses which rendered the re-sawn sticks anything but straight, so I had to cut up another piece. At the end of the day I have all my stock prepared a couple of millimetres oversize for section width and height. I’ll let it sit over the weekend and take the material down to size next time I’m in the shop.
Thanks for visiting the Carpentry Way. There has been a bit of a hiatus in posting, and I appreciate those readers who have reached out by email to check in on me. Will endeavor to get back to regular posting, and yes, still working on some videos of other projects….
via Tumblr https://davidpires578.tumblr.com/post/164918655289


No comments:
Post a Comment