Penultimate post in this thread.
The rest of the panels were fitted to the framework:
A slightly different view:
The variegation of the WRC panels was a head-scratcher to work out. A ‘perfect’ checkerboard of alternating dark and light panels, each 90˚ rotated to its neighbor, was not to be. I would have needed to obtain a couple of boules of WRC to make that happen, and the budget wasn’t there for that. It would also have been nice to make each panel out of a single board, and not two - - there’s always another level, you know? Even to use two boards for each panel is somewhat luxurious by Japanese standards.
Remember that the above view of the ceiling is of the backside, not the side you will see when it is installed.
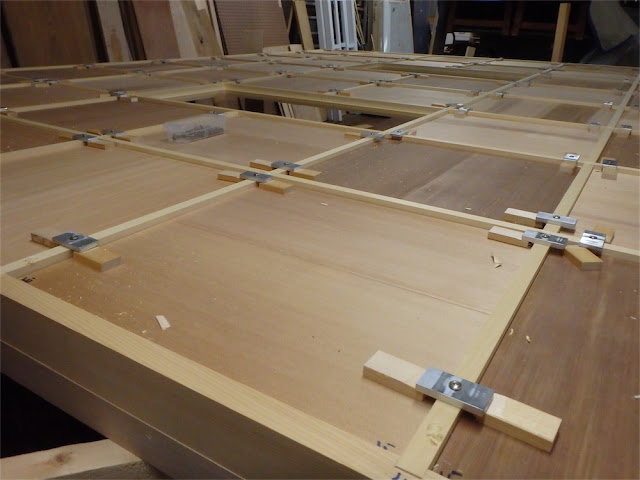
While that ceiling seems 'done’, I had been mulling over a good way to hold the panels down snug to the frame, given that there is very little room to spare above the ceiling to work with, and came up with a solution involving aluminum clips and wooden wedges.
While a system of clips and wedges doesn’t seem like such a major task, it took me a full day to cut the parts and install:
A closer look:
The aluminum bars can be rotated 90˚ into alignment with the frames, thus giving plenty of room for the panels to be slotted in, and then there’s just enough room to get in there, rotate them back and push some wedges in.
Also complete is the replacement sliding window:
And the shōji have all been repapered - here’s 2 of the 4 doors:
These all have the tear-resistant paper, which is 4x tougher than the standard paper, but not as easy to install on the frames.
Will be disassembling and packing up tomorrow, for install the following day. Hopefully it will go smoothly and predictably.
All for this round - see you next time! And a Happy 2017 as well!
via Tumblr http://davidpires578.tumblr.com/post/155322638264


No comments:
Post a Comment