Working on the final construction phase of this project, namely the front bifold doors. Bifold doors are by no means common on Chinese or Japanese cabinet, however I have seen a Japanese armor cabinet with bifold doors. Not that precedent is/was some sort of factor driving the design of this piece. Bifold doors, though more complicated to fabricate than single doors, project half the distance into the room, and the folded assembly can be tucked to the side of the cabinet without running into the wall behind.
When done, the doors will present a wall of bubinga across the front of the cabinet:

The hanging stiles at each corner incorporate a built-in pivot rod, which is offset forward and outward, serving as hinges. These allow the doors to move 270˚ and tuck to the side, unlike traditional Chinese examples, where the door could only open 170˚ or so. There will be quality brass hinges as well, three on each half, which effect the folds. I just ordered those hinges from Brusso, and they will be here any day now.
I re-sawed and dimensioned the front panels from the original bubinga slab about a year ago. The slices were initially dimensioned to 0.5" thickness; after about 6 months of acclimatization in my shop, they were taken down to 0.375" (9.5mm). They have sat since, and remained nice and flat so I am very confident at this point that they will remain that way from here on out.
The panels will be contained in frames and the frames and panel will be tied together and stiffened by way of 4 dovetailed battens per panel. That makes for 16 batters per set, and with two cabinet 32 battens altogether. These will receive shouldered tenons on both ends, so I have 256 faces of material to shave off the ends. Might as well get started on those bits….
The stock was re-sawn, jointed, planed, sat, was re-jointed and re-planed down to finish dimensions. Tenons next. I’ve cut tenons in a bunch of different ways, by hand and machine, and this time, as with many other junctures in recent months, it seemed like the milling machine might be a good way to cut the tenons.
First off I rough cut one tenon cheek on each end on my table saw, then deck the cheek to the required mark:

Then back to the table saw to cut the other tenon cheek:

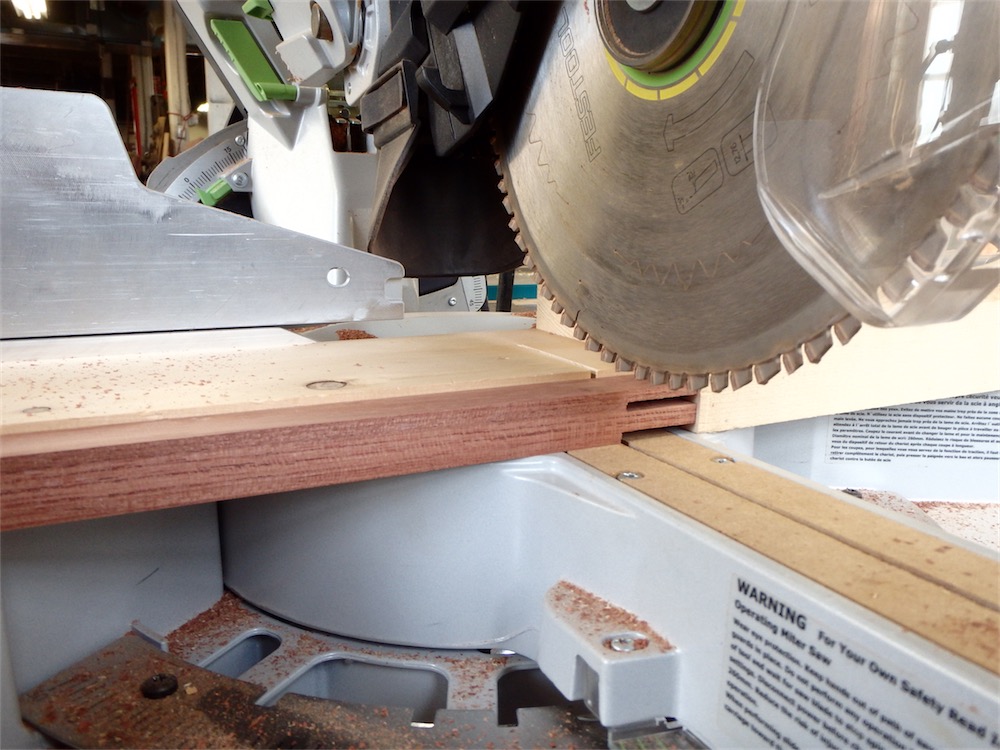
Then over to the chop saw to remove waste:
In one of those rare ‘time and efficiency’ moves (for me!), I lift the stick and drop the waste into the adjacent off cut bin immediately following the cut:

Once all 32 sticks are through to the same stage, I re-set the mill, using the same end stop position, and deck the opposite cheek of the tenons:

This process produced a decently accurate result:

Once all tenons were to thickness, I re-set the mill again, this time to deck the narrow sides of the tenons a slight amount:

I soon decided that a different cutter was called for, and re-set the depth and position accordingly:

The result:

Another view:

Dimensional fidelity was fine:

The completed batten tenons, from one end:

I feel like the mill was a good way to tackle that task, and took about the same time as other methods yet with slightly better accuracy.
Below the pile are the door stiles, which are being taken down to dimension over several days and stages of jointing and planing. I really want to keep those parts as straight as possible so the doors will tend to remain flat over time:

The hanging stiles, not pictured above, were cut out, dimensioned, and processed for their incorporated hinge rods a couple of months back. We’ll get to those soon enough for mortising.
Next up in this process will be the dovetail trenches on the panels however. And that will have to wait a spell as I am switching over to a Japanese ceiling project with the next entry on the Carpentry Way. Hope to see you there.
I hope my American friends have a great Thanksgiving, and for the rest of the world, I hope your Thursday is as sweet and smooth as can be.
via Tumblr http://davidpires578.tumblr.com/post/153603054719
No comments:
Post a Comment