Saturday, May 13, 2017

My Journey As A Creative Designer - Woodworking and Beyond #1834: Lots of Fun and New Projects!

I am finding that the greater amount of time between blogs is directly related to the amount of information that I want to share with you all. But that would follow common sense, wouldn’t it? 


It seems that it is harder for me than I originally thought to get back in the habit of posting each morning or nearly every morning. I just can’t get back in the rhythm of things. But I am doing my best, and that is what I can offer. 


As usual, things have been moving fast and furious around here for me. I can’t believe we are into May already, and the days are warming nicely and things are really starting to fill in and green up. Unfortunately, the dreaded black flies are also back. I am highly allergic to their bites and they love to attack me as soon as I poke my nose out the door. I am trying some new things though this year and I hope to overcome them as much as possible. After spending the winter inside, I need to be able to get some fresh air and get out for a bit each day. I will report on that later on, though. 


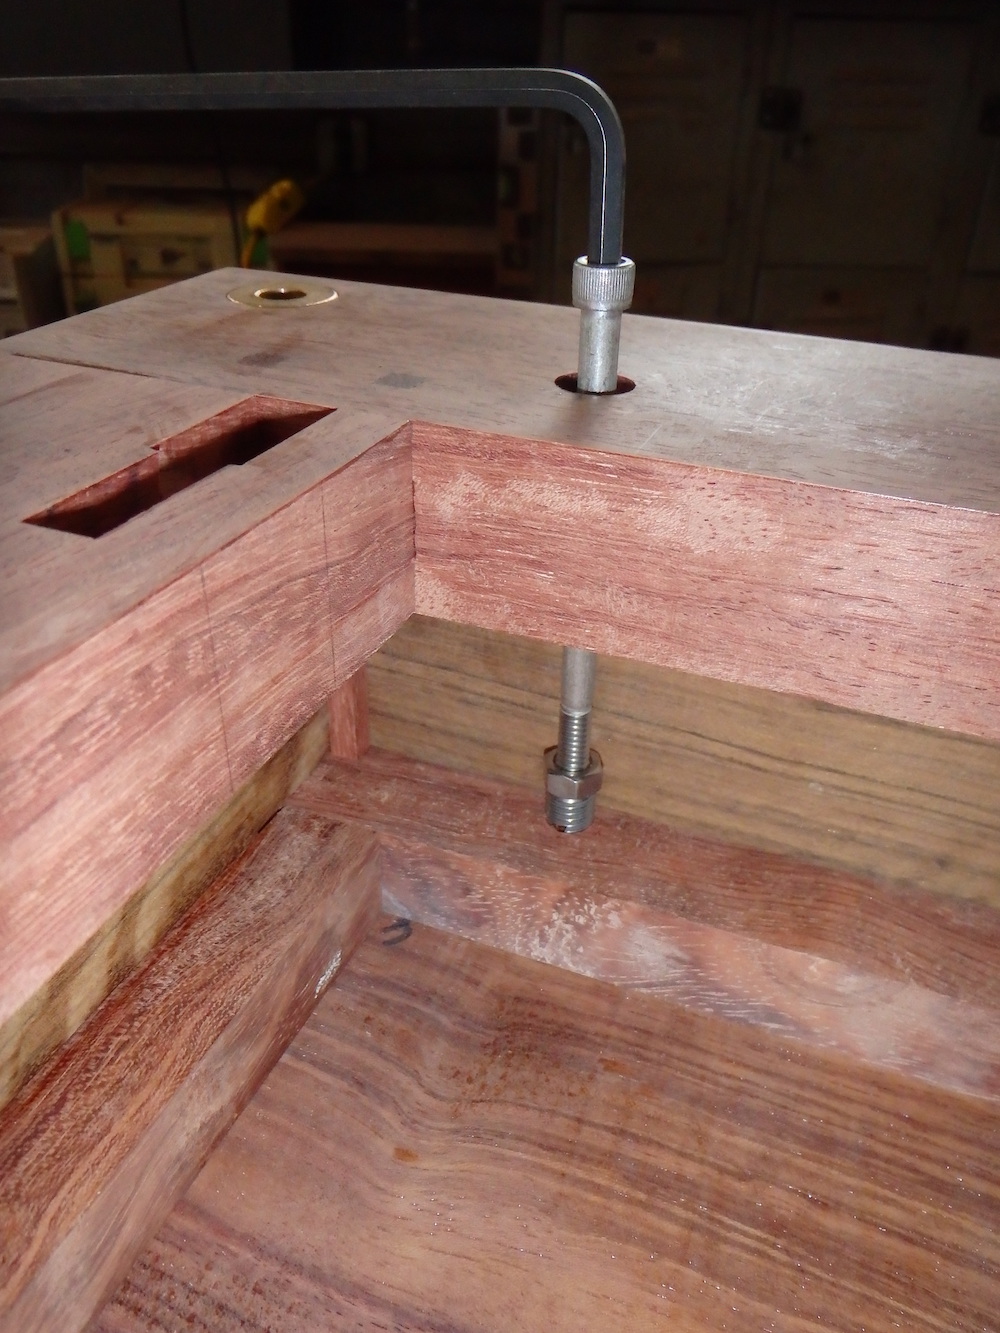
Much of my time has been spent working up in my beautiful shop and cutting orders for my painting followers. I can’t tell you all how much I enjoy working up there in a space that is dedicated just for my woodworking. We are approaching a year since we moved here (the end of June will be our ‘official’ anniversary) and there isn’t a day that passes that I am not grateful for such a lovely place to live and work. I feel it makes all the difference in the world. 


It is odd how things work out, though. While I am doing more woodworking than ever, it may appear to my woodworking followers that I may have given up on it. I have actually had very little time to do much else. Settling the business into the new direction has taken much of my energy, and I haven’t found much extra time to paint, embroider, or even design much. With five months into the new year, I can count on one hand the number of new designs that I created. I know though that this is a temporary thing, as it was the incredible popularity of the Lynne Andrews Ark Project (www.lynneandrews.com) that has kept me so busy. Both Lynne and I are so, so grateful that the project has been so well-received. Its’ success has been far better than our wildest dreams! (Thank you, everyone!)


I am also working on several other projects – both with other artists and on my own – that will come to light a bit better in the near future. As always, slow and steady will win the race. I am a firm believer in planting seeds that may take many months, or even years, to come to fruition. I attribute this approach and patience to the amount of success I am having. It is better to take the time to build a strong and steady foundation than to fly by the seat of our pants and hope something comes to be. I think that what I have been doing will have lasting effects on the business. 


I was fortunate enough to have Woodcraft (the long-standing woodworking store) invite me to participate in a series of articles they were doing called “Moms in Woodworking”. It was created for the Mother’s Day weekend and my segment came out yesterday. You can read it here: Woodcraft Article


It was nice to be recognized in this way and I think they did a nice job on the article. It feels good to be recognized in a positive way like this by my peers. I am very grateful. 


After cutting literally thousands of Ark pieces for the Lynne Andrews Ark project, I was finally able to take some time off last Sunday and begin painting my own Arks. I hadn’t really taken a “day” off in over five months. I think it is time to step back once a week or so and give myself some non-working creative time. I just need it. Here is the result of my efforts:


This is the large Ark and is called the “Maiden Voyage”. There are 13 small Ark ornaments in the series and one large plaque. This is the plaque that will start us up. I love the details in the little animals! 


I am trying to pick at it in the evenings after my 'regular work’ is done. It actually goes by quickly, even for a slow painter like myself. You can join our Facebook group and see everyone else’s progress if you like. it is called Inspirational Ark Series by Lynne Andrews and you don’t have to paint to come by and observe. We love cheerleaders as well as other painters. I hope to see some of you there. 


The next 'series’ that I am working on is with another amazing artist named Amy Mogish. Amy approached me last year to do a Halloween Club, and I jumped right in.


The club will consist of four mailings which contain three ornaments and painting instructions in each for a total of 12 ornaments. The first mailing is going out June 1st and subsequent ones will be July, August, and September. That way everyone will be finished just in time for Halloween. You can see how it works, all the additional perks, and join at Amy’s website: Classic Amy Joanne (www.classicamyjoanne.com). There are lots of fun perks to joining, and the projects are fun, easy, and beautiful!


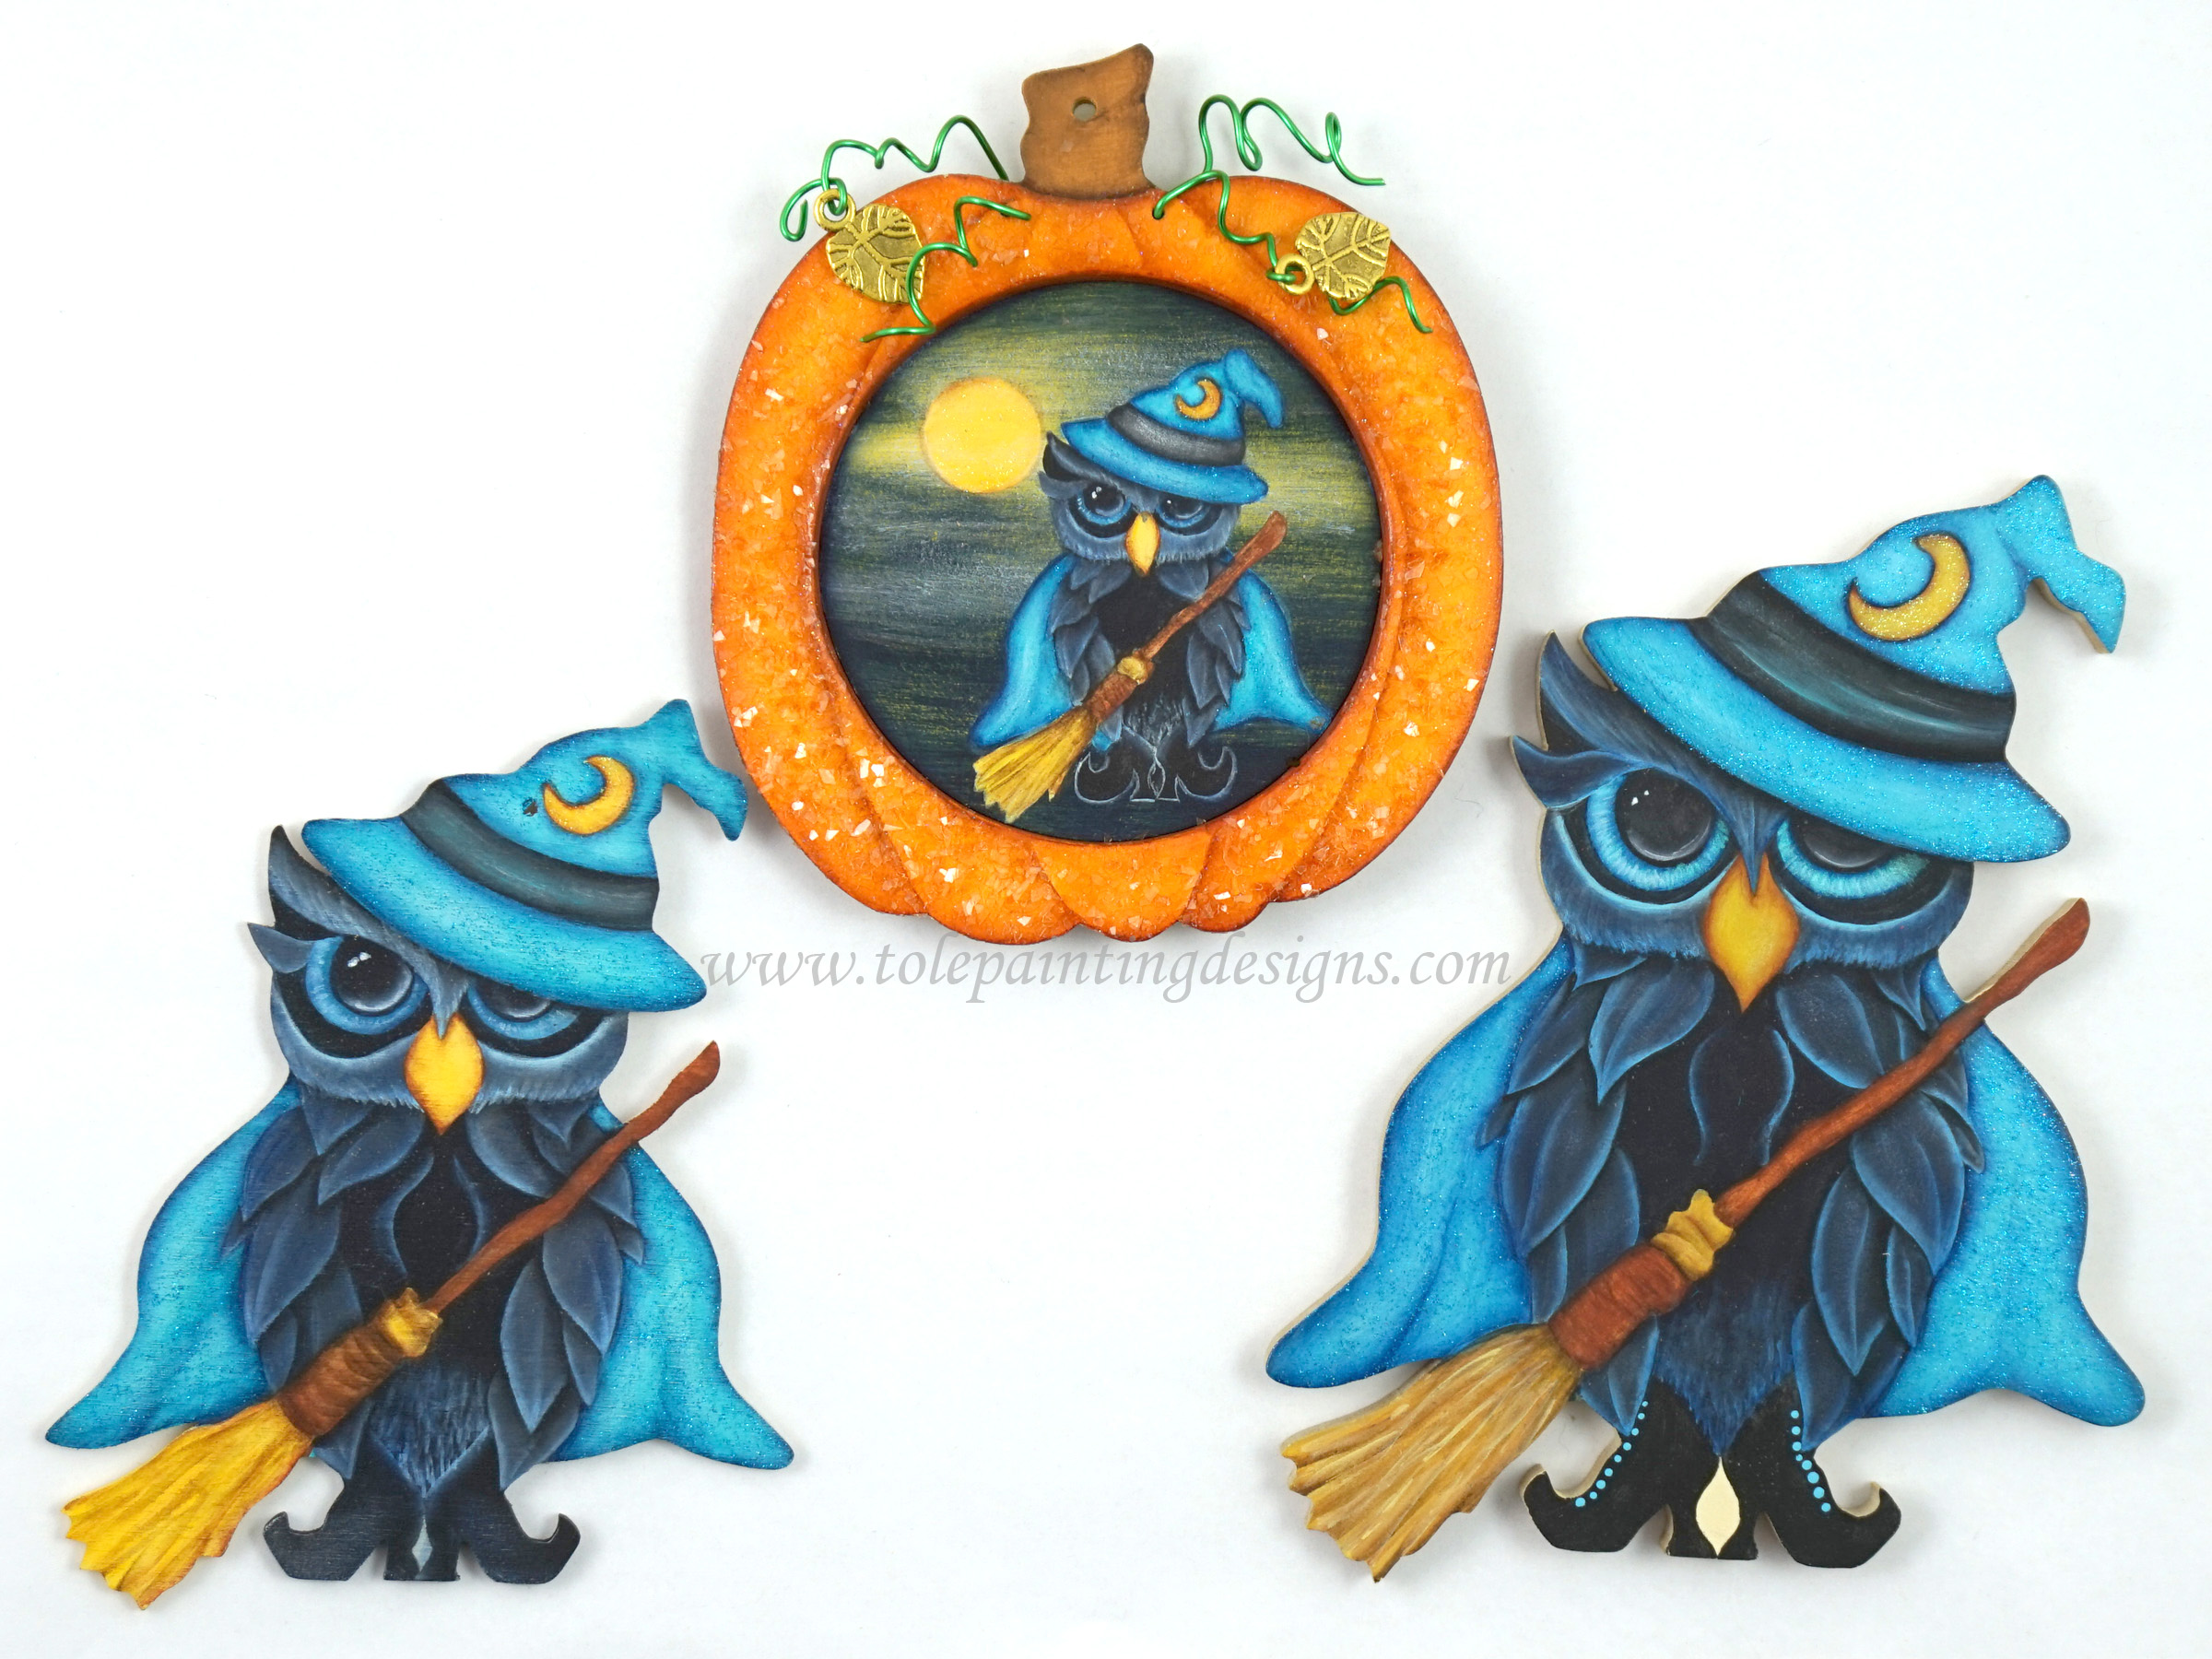
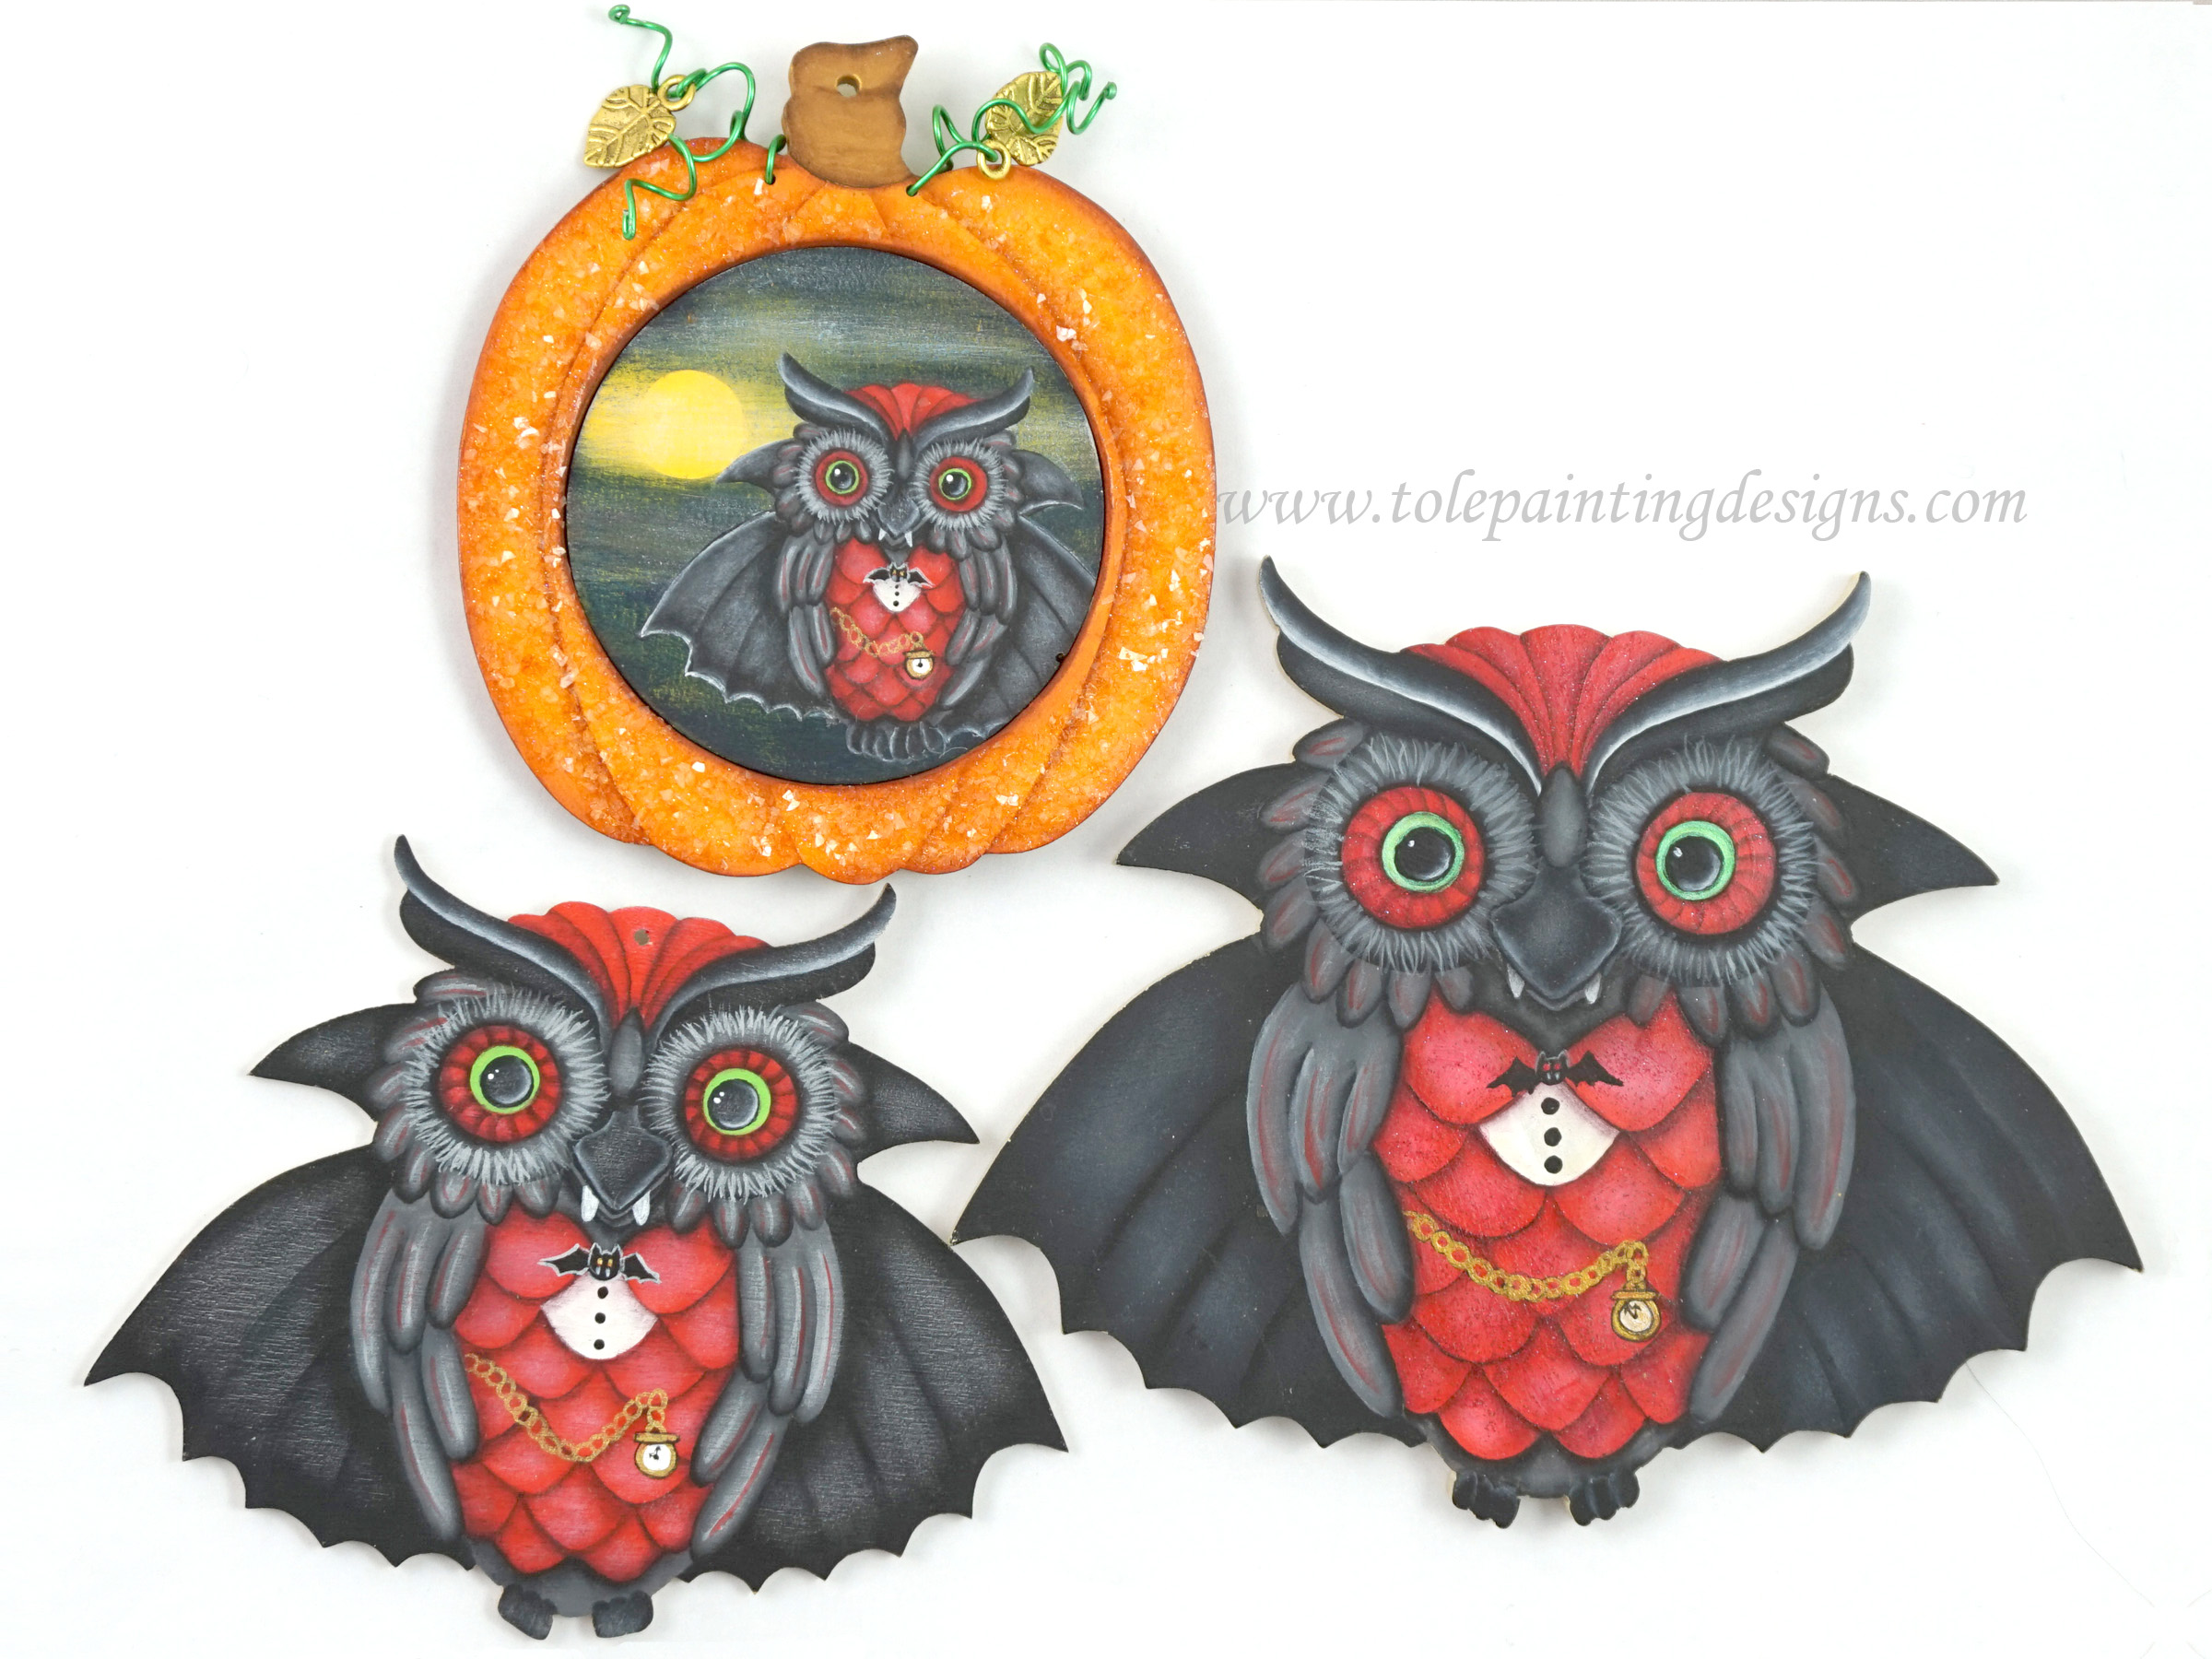
I also wanted to remind you all of my own special offer on my little owls. 


So far they have been very popular and I will be adding more owls soon. The patterns are all-inclusive and have over 45 photos in each so that even a beginner can follow along and paint the cute pieces. I hope you give them a try. 


And this weekend, I am working on another project. It is going to be fun and cute and a little bit spooky! (Yes – I am working on Halloween!)  


It is never too early to have some scary fun, right? 


I also have to catch you up on Keith’s new designs. He has been busy as well. Over the past week or so he created two new design pattern sets for health care professionals. 


First, he created a project for Paramedics:


His SLDK721 - Paramedic - The Thin White Line contains the instructions for the two versions shown above. 


He also created a plaque set for nurses:


His SLDK722 Nurses - The Heart of Healthcare also has both of the plaque patterns shown above. 


I think they are all great for gift giving and acknowledging those vital caregivers. 


Finally, Keith has a new sectional Bible passage:


His SLDK413 - Isaiah 40:31 Sectional Bible Passage pattern is a nice addition to his other large sectional plaques. We hope you like it. 


So you see, we have both been quite busy. Once again, I promise to try to write more often. That way I can do shorter blogs. I have lots of fun new projects in mind and so does Keith. We hope to keep you all busy and entertained on many levels. 


It is a beautiful and sunny day here in Nova Scotia. I hope you all have a wonderful and happy weekend. 


Happy Saturday to you all! 


via Tumblr https://davidpires578.tumblr.com/post/160619238719

Saturday, May 6, 2017

Chicken and Vegetabl

Chicken and Vegetable Stew – This classic comfort food dish is simple to make. And thanks to the addition of cream cheese, this recipe will taste restaurant-worthy.

via Tumblr https://davidpires578.tumblr.com/post/160366697444

Glazed Stuffed Meatl

Glazed Stuffed Meatloaf – Serve up a showstopping recipe on your dinner table. This dish is sure to wow your family thanks to the gravy topping and unique hard-boiled egg center.

via Tumblr https://davidpires578.tumblr.com/post/160366697239

Wednesday, May 3, 2017

A Ming-Inspired Cabinet (96)

On many of my projects I place my maker’s mark. Sometimes these marks are hidden, sometimes they are more obvious to view. I often ask the client which they may prefer, and so far people seem to like to see the mark.

In the case of these cabinets, as they draw from many architectural elements, I thought it fitting that the maker’s mark should do something similar. A few years back I made a Japanese temple garden lantern and incorporated gegyō, which are hanging pendants originally used to cover the ends of ridge beams and purlins. On the gegyō I fitted carved bloodwood flowers, like this:


It is not unusual for gegyō to have flowers on them; in fact it is a fairly standard thing. The typical gegyō has a hexagonal flower which is termed a roku. Here’s an example:


Here’s another one:


The same motif shows up in a number of places, for example, kugi-kakushi, or decorative nail covers seen inside a traditional house on the nageshi (a type of tie beam, later just a trim piece, fitted around columns).

I usually employ a stylized Chinese bellflower, and place it within a pentagon. The pentagon is a nod to the Golden Mean. However, I have found many people do not notice the pentagon inlay at all, and merely see the flower element, so I had been thinking about how to address that. For this cabinett I have gotten rid of the pentagon inlay and instead made the flower itself more overtly pentagonal in shape.

While most gegyō are 6-sided, other versions do exist, including pentagonal. Here’s an example of what is otherwise a somewhat rare form:


When 5-lobed, the flower would be termed goyō instead of rokuyō.

With that in mind, I created a new maker’s mark. The surrounding frame is double lozenge in shape, making use of some of the spare door lattice kumiko I had:


The bonnet sill and cap each have a triangular housing to accept the frame:


Then comes the flower, and, after a hole is drilled, the mounting bolt:


The back of the flower has 4 notches cut to fit precisely to the lozenge frame. That was tricky to do but it came out as planned.

Locking the flower down (which in turn helps secure the lozenge frame to the shedua standoff panel), is an ebony ‘pistil’ (the Japanese term for this part is taru no kuchi) and a decorated holly collar (kikuza):


To keep the 'pistil’ as small/short as possible, the metal insert goes in about ¾ of the way, and the holly collar wraps around the protruding bit.

Assembled:


 The heart-shaped cutouts are a traditional feature of rokuyō and goyō. The are termed, interestingly enough, i no me (猪の目) which means 'eye of the wild boar’. Not to er, 'boar’ you, but the Japanese word transliterated as 'me’ is pronounced like the English word 'may’

Another view:


The client’s cabinet also has a goyō mark,  however it employs different woods so I’ll keep a blanket over that, so to speak, so as not to spoil the surprise. Hopefully the client will like it.

With the maker’s mark fitted, I could now do the final assembly on the upper bonnet frame. The parts were pushed together until the joints started getting tight:


I took a video of the process:


Note that video quality in the first few hours after upload is on the poorer side. The HD version will appear soon enough, once the video has been completely processed by YouTube.

After the pegs were trimmed flush, I put a coat of finish over the peg locations:


Another step remained, and that was to lock the bonnet upper and lower frames together. The client lives in a seismically active area, and the cabinet will have a couple of large hooks holding the top of the cabinet to the wall framing. I needed to lock the two bonnet layers together so they would not come apart under that sort of loading, and, just like the Japanese do, turned to metal fasteners to accomplish that task.

The two halves of the framework were assembled around the shedua standoff to start:


A series of steps were required to counterbore, drill, mark, drill again, and finally an insert could be fitted using the fastening bolt with a nut to jam against the insert:


Using the bolt in the entry hole to drive the insert into place ensures it lines up properly. The bolt and the insert are stainless, and there is one bolt in each corner.

A while later, the top side of the frame received one last thin coat of finish:


A look at a corner showing the stub post in front of the brass bushing for the door:


All for this time. Thanks for visiting the Carpentry Way.

via Tumblr https://davidpires578.tumblr.com/post/160286631694

Tuesday, May 2, 2017

My Journey As A Creative Designer - Woodworking and Beyond #1833: Some Big Changes

As our small business gets larger and becomes more diverse, we are continually making changes – small and large – to accommodate expansion and keep everything running as smoothly as possible. This is one of those things that often goes by unnoticed by our customers but takes a great deal of time to accomplish. If we didn’t do it, however, things would appear sloppy and awkward and it would be terribly difficult to find the things we have to offer. Our website would be a mess. 


I give a great deal of credit to my partner Keith. While my head races in twenty-three directions of things to design, he is the true organizing force behind Sheila Landry Designs and struggles to present our ideas in a logical and organized fashion. His attention to detail and “consistency” is something that I have never encountered previously. He truly is the reason that everything on our site looks so nice and is presented so beautifully. While our website is built on a template that can sometimes be rather restricting, Keith has the knowledge and expertise to override many of the restrictions that come with that and make our site and your experience here easy and pleasant. I am very grateful to him. 


I constantly drive him crazy with ideas that I come up with. It is seldom that I create a design without wanting to offer several variations to my customers. This is due to my contact with so many people, I realize that everyone is different and may have different uses for the designs that I create. I like to offer options so that people can apply my work to whatever they were thinking. I believe that diversity in a design adds to its value. I know Keith agrees, but sometimes it is hard to present the many variations without confusing people. It is definitely a skill that is learned over time and I believe that Keith has it down to a science. 


Several years ago, I purchased the domain name of “www.tolepaintingdesigns.com”.  Back when I got it, I was just beginning to re-enter the decorative painting world as a designer. I thought that it would be a good thing to have if I were to change or expand my venue from scroll saw and woodworking designs to decorative painting designs. For the past several years, as my presence in the painting world has grown, Keith and I have considered splitting up our website and having two sites – one for woodworking and one for decorative painting. This way when one came to our site, they would immediately be in a comfortable place and it would (in theory) be simpler for everyone. But two sites means double the work and expense in many ways. Things like the blog here would need to be copied to both and it would be hard to pick and choose on many issues which side of the equation to keep a certain topic or item. Many things overlap still and we all know that just because we are a woodworker or a painter, doesn’t mean that is the only scope of creativity that we enjoy. I think there are many advantages to having things in one place, and so does Keith. so for now, we are keeping it to one site, but we did a bit of work (mostly on Keith’s part) that more clearly defines each aspect of our business – the woodworking and the painting sides – and hopefully made things a bit clearer to you – our visitors and customers. We hope you agree that these changes make things better, easier and clearer to you all. 


For those of you who are our woodworking customers, things will stay pretty much the same. If you go to www.sheilalandrydesigns.com, you will land on the woodworking home page and see all of our latest designs displayed. On the left sidebar, all of the scroll saw categories are listed. There are also categories like Pattern Specials, Free Patterns & Resources, this Blog, and so forth at the top of the page. That has remained the same. 


It is our painting followers that will see the biggest change.


If you use the URL of www.tolepaintingdesigns.com, you will arrive directly on the Painting Patterns Home page. (You can also get to this page by the large button at the top of the main Scroll Saw Patterns Home page.) Once you are on the Painting Home page (or any of the Painting sub-pages) the sidebar changes to the painting categories such as Painting Patterns, Painting Surfaces, Embellishments, etc. 


The Patterns page is quite straightforward and self-explanatory.  The Painting Surfaces pattern is completely re-vamped. The first section is completely dedicated to surfaces that I have created and offer for other artists, and then under that, there is a section for “General Purpose Wood Kits”. These are surfaces designed by myself that can not only be used with many of my patterns but are also waiting for you to apply your own creative flair to them to use them for anything your heart desires. 


The Painting Patterns page has probably gone under the most drastic change. Now, by clicking on each specific pattern, you are not only brought to the pattern description, but there is a table under the main pattern product that shows the available surfaces, Combos, and Super-Combos available that go with that pattern. This, we feel, will make it incredibly easy for you all to get everything you need for creating your project.


Some may want only the pattern, and that is great. Others want the wood, charms and other pieces available and no longer will have to go hunt for them on our site. Others may be looking only for a surface from a particular designer. With the new layout, we think this will make things much easier and clearer for everyone. (Thank you, Keith!) 


We hope you give us feedback as to our new layout and let us know what you think. We are quite excited about it. 


We are sending a newsletter out later today letting our regular customers know of these changes. If you haven’t done so already, I invite you to sign up for our Mailing List to receive our newsletter. It is sent out about twice a month – give or take – and showcases our new patterns, new sales, and updates we are offering. We even offer special discount codes from time to time for our subscribers only. We never share your information or spam you. It is a good way to keep up with our new patterns and designs. 


Now for my new designs …


Today I am finishing up my patterns for my three new owl series that I call “Owl at the Moon”.  I spent the past several days re-painting these designs so I can take step-by-step photos for the patterns. Each pattern packet will have over 30 step-by-step photos and the owls will come in three sizes – Ornaments, stand-ups, and an extra small size which will fit in my SLDP141 Round Pumpkin Bevel-Cut Ornament surfaces. I also am including background instructions so that the little owls can be painted on any surface you choose. (See where the “variation” issue comes in! ;) )  


The three owls that I have are SLDP257 - Broom Hilda


SLDP258 - “Booboo” Owl:


And SLDP259 “The Count”:


I am finishing up writing the patterns today and they should ship out or email out on Wednesday. But all the wood and kits are up on the site and ready to order. 


As I mentioned, there is a newsletter that is going out today as well. Keith has his three new patterns:


SLDK718 - Eagle Desk Clock


SLDK719 - Let it Shine (Matthew 5:14-16) plaque:


And his SLDK720 Professional Grandparents plaque pattern set:


I think they all will make lovely projects.


Thanks for putting up with such a long blog. I was going to write earlier this week, but many times while Keith was changing things and moving things around, we didn’t want to publish our site because things weren’t done. We finally went “live” yesterday and we hope that you find these changes helpful and make things nice and easy for you. Your feedback is always appreciated. 


I will be writing for most of the day. Then I will be moving on to new things in the next day or so. I hope to blog more frequently as I have many projects that I want to share with you all. 


Until then – Happy Tuesday to you all! 


via Tumblr https://davidpires578.tumblr.com/post/160228403749

Monday, May 1, 2017

A Ming-Inspired Cabinet (95)

I’ve been working on the final steps in preparing the bonnet assemblies for these two cabinets. The bonnet provides a visual way to ‘crown’ the cabinets, so they don’t end up looking simply like a pair of boxes on stands. It’s an unnecessary thing from a functional perspective to fit bonnets, but vey much a necessary thing, it seems to me, from an aesthetic one. This is where I leave minimalist/modern behind, not that I even see eye to eye with it anyhow.

If I remove the bonnet from the composition, something seems missing, and not in a good way. It’s not shibui, it’s simply incomplete: something is lacking.

I did tone down the lines of the bonnet top beams, as detailed in an earlier post, and what I was left with was a raised section on of framing on a shedua stand off, and there was as a result a bit room in there for a storage compartment.  "Oooh, a hidden compartment" raises now into a specter of the possible.

The thing is, while concealed compartments at one time served a necessary security function - in the case of early American secretary cabinets, for example - or, in the case of pieces made by the Roentgen’s for French nobility, an entertainment function, when it comes down to what makes sense today, it was less a fixation on a secret compartment than it was on having a discrete compartment. This is a compartment which is not entirely obvious to view, though if you went looking for it (what kind of nut bar does that but a furniture maker?) the access would be obvious enough.

I didn’t want some sort of obsession with secrecy to affect the aesthetics of the cabinets, or to become a central idea of the cabinets, or to require any complex means to achieve realization. Just wanted to make use of available space in a practical manner, and wanted to create a space where things might be tucked away, requiring only occasional access, perhaps got at once in a while for the fun of it. This made more sense to me than the 'secrecy’ aspect. If you truly want to hide stuff away from those who might pry, then get yerself a heavy duty iron safe with some complex lock, and make it clear to view (then hide your stuff elsewhere, perhaps, thus providing a fake target with the safe (?)).

Anyway, I wanted a compartment with a removable lid, and wanted to have the lid openable by simple means, and, oh yeah, all parts in solid wood. A lid in bubinga, keeping it decently thin, still ends up being a bit of a lump. So, working out a catch mechanism took some mulling over to be sure.

I thought I had worked out a good solution and then spent a day and a half milling up some mounting blocks in brass. This was the result:


I’ve learned a bunch about milling brass in the past few days.

A closer look at one of the temporarily-clamped side-mounted blocks, with the fitted spring pusher mechanism:


That set up proved the basic concept of catch paired with two blocks and sprung pushers did work, however further consideration let me to conclude that the system may not be the best over time: I was worried that the constant pressure of the sprung pushers on each corner of the lid, relative to the catch in the middle, might, over time, induce the lid to become deformed. It was enough of a concern to lead to the scrapping of the above machined brass blocks.

So, out with that, setting aside the fallacy of sunk costs and all that, and onto the Mark II design, which incorporated both catch and spring pushers into one wooden block.

Here, I’m tapping for the M12 threads required for the sprung pushers, using a center punch in the chuck to keep the tap handle plumb:


As you can see, an insert (¼" x 20TPI) had already been fitted in the middle.

The completed mounting blocks:


The spring pushers are a device from the CNC fixturing world, and are from Misumi USA. They are good to deal with.

I also obtained the tool to screw the pushers into place:


In the middle is the pointed marking pin which had served duty earlier with the bifold doors. It’s nice to find it useful again….

These are the second set of spring pushers I had to obtain. They come in four strengths of spring, and the first set proved to be too weak.

A while later, I have mounted one of the blocks to the inside of the compartment using inch-scale stainless fasteners, namely #10-24 Allen cap screws:


One of the quirky things about inch scale bolts arises when you go below ¼" in size. Unlike metric, where everything is on a even round 1mm incremental pattern, like 10mm-8mm-6mm-5mm-4mm-3mm, etc., with inch scale, it’s a tad more complicated. While larger sizes of bolts from 5/8" down are on even 1/16" increments, stepping along 5/8"-9/16"-½"-7/16"-3/8"-5/16"-¼", when you go below that ¼" mark you do not arrive at the next 1/16" division (3/16") as might be expected: suddenly it switches to a #12x24TPI designation.  That #12, however, is an uncommon size, and the next regular sort of size you come across at the hardware store is #10-24TPI. And #10 is not exactly 3/16" (0.1875"), but a hair larger at 0.1900".  Hah-hah-hah….. Take another drink Jim.

It’s one of those weird things, which, if you are 'used’ to it, is not terribly consequential - you go to the hardware store and find the appropriate fastener which fits what you need - however if you are not used to it, being used to, say, the metric system, this standard will seem baffling and illogical, maybe ripe for a suitable amount of derision even. I understand, and please feel free to refrain from extended soliloquies in the comment section relative to this point. I get it. I didn’t create this system, I merely live within it, and a little kookiness is okay I guess, keeping poor blighters like me on my toes at the very least.

When you dig into it, you find that threads which are smaller than ¼" are defined by wire gauge standards, and the sizing is based on a sweet l'il formula:

The following formula is used to calculate the major diameter of a numbered screw greater than or equal to 0: Major diameter = Screw # × 0.013 in + 0.060 in. For example, a number 10 calculates as: #10 × 0.013 in + 0.060 in = 0.190 in major diameter. To calculate the major diameter of “ought” size screws count the number of extra 0’s and multiply this number by .013 and subtract from .060. For example the major diameter of a 0000 screw thread is .060 – (3 x .013) = .060-.039 = .021 inches.
Okay, you can wake up now. The above quote is from the wikipedia entry on the Unified Thread Standard. I chuckle as I read it. Some things in technological societies get fossilized while some do not, what can you say?

Anyhow, I used 10-24 stainless bolts to mount the blocks to the framing. I could have gone with 5mm, which is fairly close to 0.1900" at 0.1968503, but whatever, it worked out and I got to amuse myself with thinking about archaic thread standards which are used today in the US instead of more apparently 'rational’ systems, and I have a 10-24 tap already so let’s move on. It gave me a certain amount of perverse pleasure - I’ll admit that much.

In the next photo I’m marking the underside of the compartment panel to the sharpened pin temporarily fitted to the position in the block (a position later to be occupied by the catch itself):


Once the location is marked, I could proceed to mortise for the catch using a couple of different forstner bits:


The underside of the board is similarly mortised, and the catch is secured by a fairly large brass nut:


The catch itself is a custom made piece from Quik-latch products - they make latches designed to hold the hoods of hot rods down at the front. I did extensive research to find something suitable, and this turned out to be the best thing I could find - and I am more than happy with the product.

Quik-latches are normally made in aluminum or steel, however at the time I got in touch with them they were in the middle of fulfilling a large order from a Scandinavian furniture company for a series of door latches in brass, and they were able to make me a set in a few days, also from brass. They sent me the 'mini’ latches in parts, and I patinated them, sent the pieces back for assembly and then the complete units were delivered a week or two later. Quik-latch is one of the best companies I have ever dealt with in all my life: excellent, prompt communication, a 'can-do’ attitude somewhat rare to find these days, and an excellent product shipped in a timely manner. Was it a weird dream, I wonder? All the same, highly recommended!

Here’s a closer look at the latch and its ¼"-20 pin, with the catch itself flipped upside-down:


The rod engages with a satisfying snap!:


Another view show how tolerant the latch is of misalignment:


Here’s the Quik-latch installed and about to be closed for the first time:


'Click’:


This mechanism worked just as I had hoped, providing a discrete means of accessing the upper compartment in the bonnet:


I later added a small relief cut to provide easier purchase for the fingertips:


A few views of the top with the latch installed, and in order to see this view in the completed cabinet you would need to stand 6’-8" or more (203cm):


All for this round. The second cabinet is about half an hour away from reaching the same stage, and then I will be doing the final assembly on the bonnet and last coat of finish. Then a little more work awaits with the bifold doors as the magnets have now arrived. More to come, so please stay tuned….


via Tumblr https://davidpires578.tumblr.com/post/160213029744