If you read this blog with a phone, there are many things - widgets and the like - on the right side which you will not see. I just learned this by seeing the blog by way of my wife’s phone. I am thinking I may need to change/modify the template so as to make those sections, which include contact info, build thread index, links to previous posts, TAJCD essay links, links to other sites, etc., visible. If you’re curious about that side bar material, then accessing this site by personal computer is necessary in the meantime.
————–
Finish application work and assembly on the two cabinets continues. This stage involves fitting the lower shelf assembly to the drawer framing assembly completed previously.
Here is a view of the underside of the shelf assembly. The central divider is also test-fitted to the shelf assembly, as a final check of the fits between shelf panel and rails:

With the tenons from the vertical divider poking through the rails and panel, I marked out offsets at the mortises for the wedges which will lock the tenons in place:

Sliding dovetail joints lock the rails to the drawer stiles, while the middle of the drawer stiles fits to the panel with a simple housing.
A view of the same assembly in its normal orientation:

There is but modest clearance between frame and panel in this system. Normally, there would be sufficient clearance gaps to allow the panel to float and accommodate seasonal movement but they can be made much smaller in this framing system, especially given that all the material is quartersawn and will not move much anyway.
The parts were then re-separated and the mortises in the rails and panel flared by chisel and file in advance of wedging.
I then took the opportunity to film a short (6 min.) video, which I trust gives some idea of how things went together. I start the video with a clip showing the lower tenon kerfing on the central divider, after which we jump to the commencement of assembly, noting that the step where I applied a little glue to the vertical stile tenons and the dovetail mortises was not filmed:
I know, I know: I look like a homeless person. I realize I’m supposed to take care to present a professional appearance in this public format, meaning ‘neat and tidy’, with my shop immaculately clean and meticulously organized, with the right sort of tools hanging on the wall to suggest old time hand tool craftsmanship, etc.. I have a ways to go.
Before the adhesive (hide glue) cured, I got the wedges in there, with a dab of glue also applied to the wedges:

The view is of the underside of the panel, normally something you would not be able to see readily in the completed piece. Without a little glue, the wedges will tend to work themselves loose over time from seasonal movement. You can also see a small patch in the panel to the left of the mortise. I can’t remember why the patch was needed, but curly bubinga flakes all too easily so it may have occurred while mortising.
The double wedged mortises form the connection between front edge of the vertical divider and the front rail, upside-down in this view:

After the glue was set, I zipped off the excess with a flush trim saw:

Later on, both units were complete to the same stage:
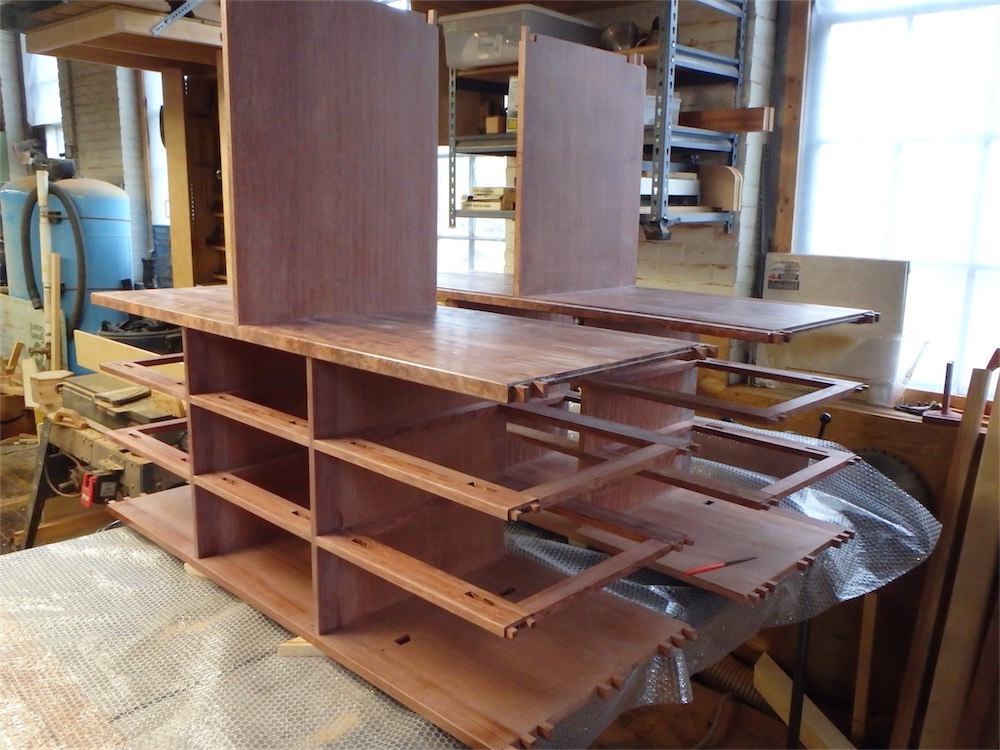
Next up in this build will be the fitting up the upper shelf and the assembly of the carcase, which I hope to complete in the next couple of days.
I also was processing some more shedua today through the usual jointing, resawing, jointing and planing process. I mentioned several months back that the SCMI planer had a poorly designed digital readout that tended to lose tolerance over time, and I had fitted an i-Gaging readout with linear scale so as to have something to rely upon. Since that time I haven’t touched the machine’s built-in readout, and have found the i-Gaging readout to be dead accurate 10 times out of 10. Today though I was shocked to note how far apart the readings had gotten, with the i-Gaging readout at top (dead perfect) and the factory SCMI readout below (a whopping 0.1", 3mm, out):

Surely they have redesigned this feature by now(?). It’s a decent planer otherwise and gives good results, but I’d really rather have a T-45 Martin. Hah! Wouldn’t we all?
I have the painter’s tape with 'Compressor On?’ stuck on the front as a reminder, since the planer employs pneumatic roller pressure and doesn’t plane so well if the compressor is turned off. I need to set little reminders for myself in a few areas of the shop, as 'lost the forest for the trees’ can certainly apply in my case.
All for today, thanks for visiting the Carpentry Way.
via Tumblr http://davidpires578.tumblr.com/post/143479455064
No comments:
Post a Comment