The Boston Children’s Museum commissioned me to repair a couple of old tansu that are located within the Kyo No Machiya, a 19th century Machi-ya, originally from Kyoto, and now located within the Museum in its own dedicated space.
Check this link out to get a better idea of the place:
http://japanesehouse.bostonchildrensmuseum.org/virtual-tour
One of the tansu is a mizuya-dansu, or china cabinet, located prominently to the side of the kitchen - or ‘water place’ as mizuya literally means just that - while the other is an large heya-dansu (lit. 'room cabinet’) located in the front room of the house, tucked inside a closet. I’m not sure, but it may have been used for storing merchant’s wares at some point, and if so, it might be better termed a shōhin-dansu.
I rented a box truck yesterday and went to Boston to extract, with help from Museum staff, the cabinets from the house and out of the Museum and take them back to my workshop. That all went incredibly smoothly and quickly.
Each cabinet is composed of two halves, an upper and a lower, which can be readily demounted from one another. Here’s the lower half cabinet from the sitting room:

Locating pins are supposed to be in place to help register the cabinets to one another, however nearly all of these pins are missing.
And this is the upper cabinet of that pair:

The newer-looking piece on top was added to make up for the gap between the top of the cabinet and the top of the closet opening.
The upper half of the kitchen cabinet set:

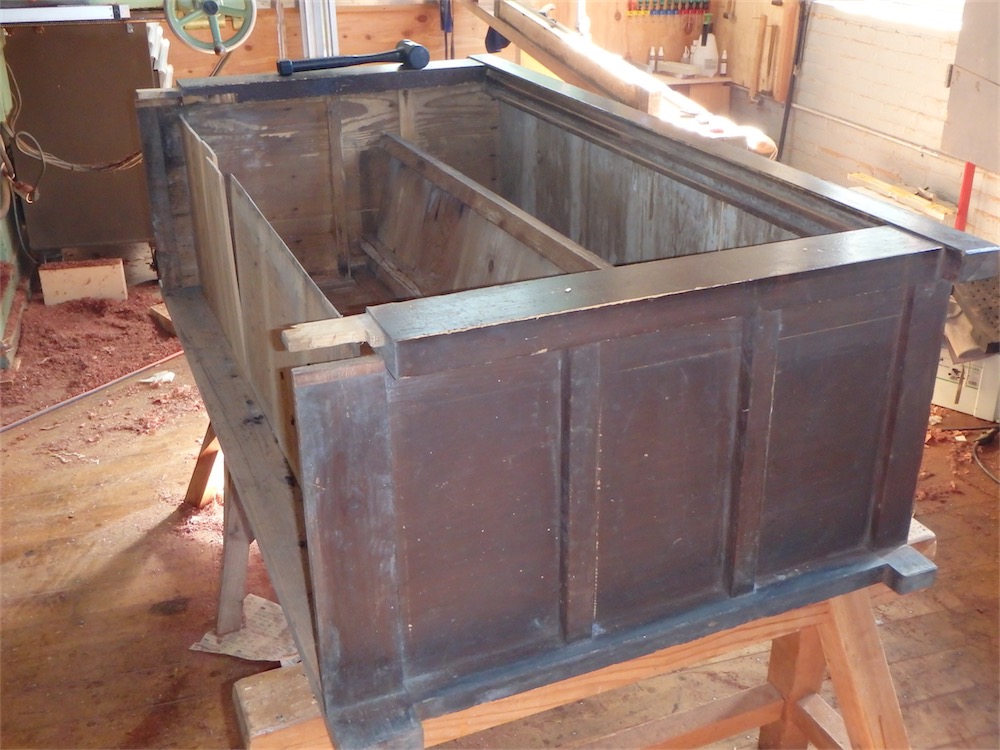
The lower half is already in surgery, flat on its back:
These cabinets exist within an unusual context as far as most tansu are concerned, namely within a children’s museum full of interactive models and equipment, over several floors. Now, picture a group of 10~15 kids descending, wave after wave, upon the Kyo no Machiya, after those same children having been primed, as it were, by all the other action-oriented stuff in the museum. Naturally, when entering the house, they want to grab and pull and push vigorously on everything they can touch. I’ve watched this in action and it is something to see. So, all the sliding doors in the house, along with the sliding doors and drawers within the cabinets, receive extraordinary amounts of wear, and much of the handling they do receive is not of the most gentle sort, as you can well imagine.
The biggest issue on these two cabinets concerns the sliding doors and their track, the surfaces of which have worn to a point which might be described as eroded, a near-driftwood-like wear pattern. The doors are very loose and do not track well in these cabinets at all.
On this first piece to be dealt with, the lower outer rail has severely worn tracks, to the point where there really isn’t much left. I was able to demount the joinery at the corners and remove the rail, the connections being haunched and wedged through-tenons:
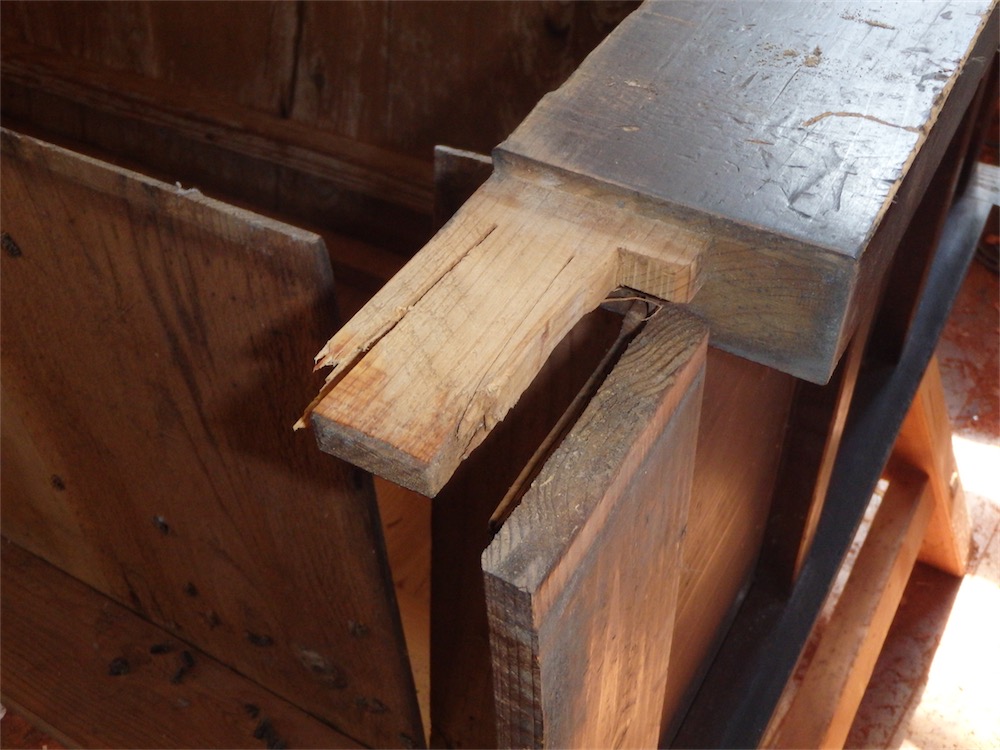
Curiously, the tenons have two wedging kerfs and yet are only flared and wedged on one side. Not sure if that was a cut out error or an item which was overlooked in the construction phase.
I had wondered how the cabinet managed to present a slimmish look for the lower front rail, which is near to a 2x4 in size, when looking at the exterior corner of the rail, and yet accommodate two doors and two tracks, much wider than the rail itself. The solution employed was simple enough, and not something I would have ever considered: they nailed on a scab rail on the inside of the frame member, rebated that scab-on piece on one side to form a track, and on the other to accommodate the end of the floor boards, which were themselves nailed down to the scab-on piece.
Toshio Odate wrote, somewhere, that Japanese craftsmen have a “different feeling” about using nails as composed to Western furniture makers. I’m not entirely sure what that feeling is/was, however it does look like enthusiasm if nothing else. Lotsa nails on these cabinets. Nails that stick out and scratch drawer sides, puncture your skin, nails that rust, work their way loose, split boards, etc…
I’m not a fan of nails for cabinet work. They have their place in construction of course.
The nails for these scabbed-on rails were quite corroded and the rail itself was easy to remove. Then I routed out the old track, or shiki-i, section entirely:

A closer look:

I leave a lip on the front so as to maintain a continuity of appearance when the repair is complete.
A rusted remnant of one nail was unfortunately found by my router bit in this spot:

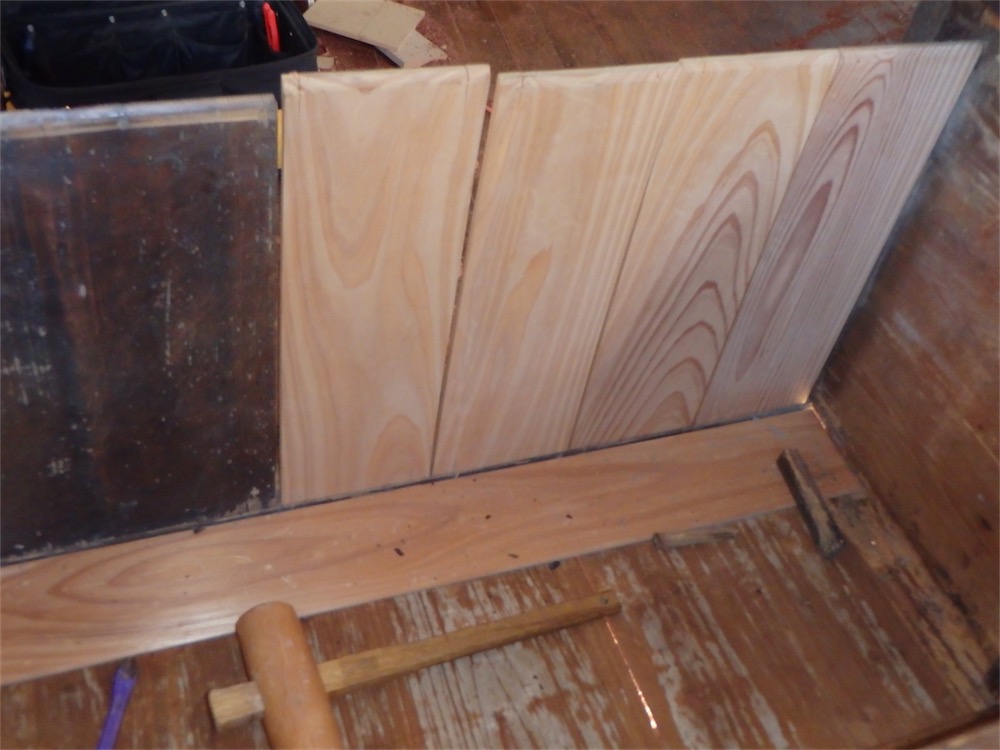
These cabinets are constructed from a softwood, namely sugi (cryptomeria japonica), and the fresh cuts above indicate its natural color. They used stain of some kind to give it a dark brown appearance, on the areas which show most obviously.
I was struck by how crudely these cabinets are made. All the attention in terms of how they were made went to the wood on the facade, while the rest of the cabinet, back , floors, drawer internals, etc., consists largely of rough boards nailed in place. Here’s the top of the sitting room cabinet:

The low humidity in the Museum also did the woodwork not help, as most of the wider panels have shrunk severely and cracks and gaps are ubiquitous. The low humidity also exacerbated the propensity of cheaper cuts of wood, such as are used on the back of the cabinets, to warp significantly.
The back of the lower half of the sitting room cabinet:

The back of the upper half of the sitting room cabinet:

I believe the six longer rear boards you can see were added at a later date, and serve to cover over large shrinkage gaps between the original panels.
The back of the upper half of the kitchen cabinet has one especially warped panel:

As for the lower half of the kitchen cabinet, at some point in the past, probably when the building was put into the museum in the late 1980’s, repairs had been undertaken, as these fresher-looking floor boards and lower crosspiece demonstrate:
Unfortunately, the floor boards had been simply nailed down, and I guess sugi is somewhat prone to splitting:

It’s too bad they didn’t take an extra 20 seconds and drill a pilot hole, or used blunted nails, so as to preclude the splitting, which was present at every nail hole. Nor did they bother to stain the floor panels to match the old ones.
The sliding doors for the cabinet I’m working on presently have also been repaired at least a couple of times in the past, with scabbed-on tongues applied across the top of the upper rails, and even some wedges glued atop those pieces, all to accommodate gaps from the tracks and lower door rails wearing severely. While it worked temporarily I’m sure, such approaches are hardly a great way to fix such doors. After I’ve renewed the tracks, I’ll see how the doors might be best dealt with. I’m aiming to turn over this repair work within a couple of weeks, so look for a few more posts to come on this topic before we return to the other cabinet build I’ve got going on.
All for now, thanks for visiting the Carpentry Way.
via Tumblr http://davidpires578.tumblr.com/post/150377776294
No comments:
Post a Comment