Things are progressing along relatively smoothly. The work I’m tackling is to cut the housings on the ceiling perimeter frame, mawari-buchi, for the ceiling cross bars, or sao-buchi. There are two housings in fact, a lower one for the exposed portion of the frame, and an upper one which keeps the frame from any tendency to twist, which would make for gaps in the housing in the exposed portion, were it to occur:

I have a piece of sao-buchi cutoff to use a a checking device for each connection, albeit, only for checking the exposed housing fit:

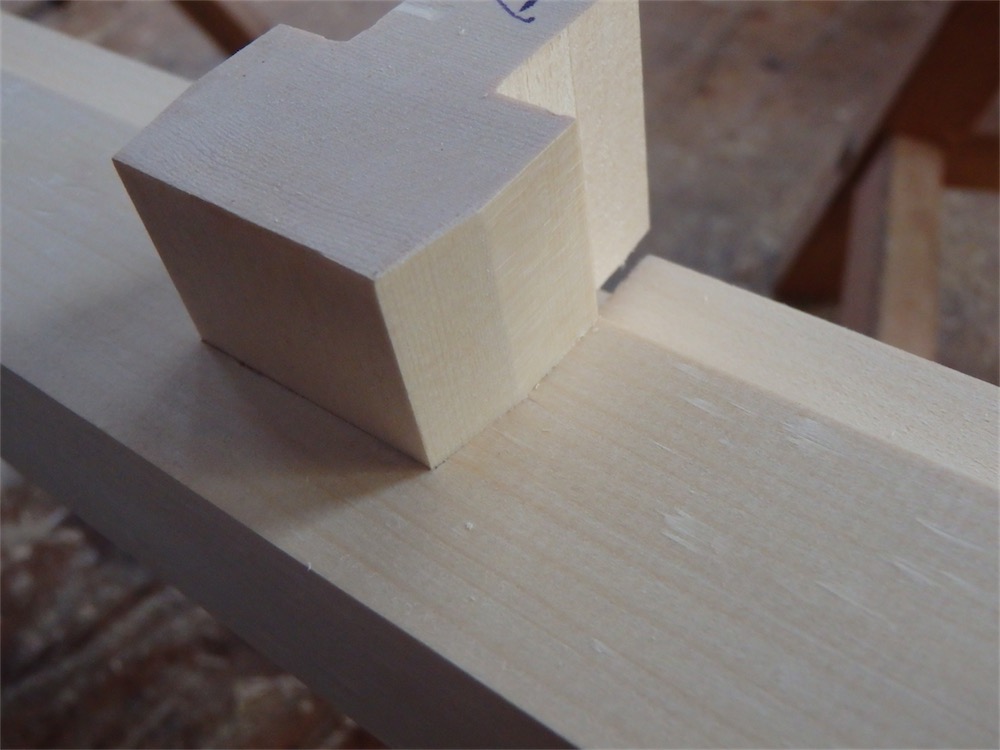
The ends of the actual ceiling rods, already cut, have a stepped arrangement so as to fit both housings on the perimeter frame.
Fully down and the fit seems to have come out okay:

There’s a little pencil mark left on the bottom which needs to be removed. The exposed faces of the mawari buchi have yet to be chamfered and finish planed, and that will take care of marks like that.
There are 24 housings to complete in total.
I guess it wouldn’t hurt to show a reflected ceiling view so readers can have a better idea as to the overall scope of work:

It is a standard aspect of Japanese traditional architectural design to produce a reflected ceiling view for a house, as ceilings vary from location to location within a structure. They are an elaborated aspect, and one that surely deserves to be drawn upon mare by western builders.
As an example or such a plan, here’s a reflected ceiling/roof framing plan from the main temple building at Shakuō-ji Temple:

Another from the Goten at Nagoya Castle:

Anyway, where was I? Oh yeah….
After the perimeter frame members were mortised, I ran them through the shaper, climb-cutting with the feeder, to chamfer the outside lower arris:
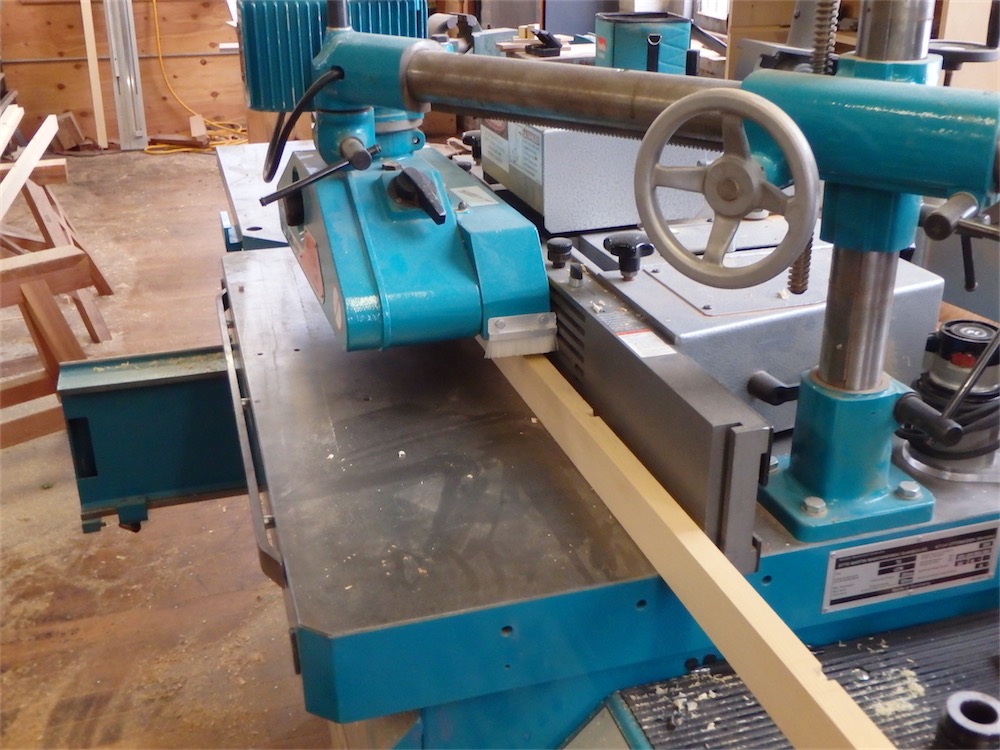
The chamfer:

Frame work completed, I could start reassembling the ceiling frame for the last time, starting with the perimeter frame, miters adjusted for final fit, and then the long sao-buchi go in:

The junction of ceiling frame member with perimeter frame mortises is provided with a degree of slop on both ends to allow for any variances in the walls, beyond which I have already accounted:

I hope the above photo makes clear the nature of the stepped end cut on the ceiling rod and the two mortises in the perimeter frame member.
An overview of the completed ceiling framework all assembled:

Another view:

At last the panels could be fitted:

Then a weird thing happened. There are 44 panels in this ceiling and I was sure I had prepared 44 pieces, however today there seem to be only 43 pieces. I cannot account for this shortfall, other than with my wallet, ahem, as I need to pick up some more Western Red Cedar tomorrow and fabricate another panel.
Install is scheduled for the middle of next week. After fitting the remainder of the panels, I have to make some small frames for the light wells, and then repaper 3 shōji. Almost done.
Thanks for coming by the Carpentry Way.
via Tumblr http://davidpires578.tumblr.com/post/155187148469
No comments:
Post a Comment