Lotsa pics today.
As I fit the demountable panel frames together, I fitted the assembled outer frames, rails and stiles, to the carcase:

In most cases, I found the frames just a hair tight for their openings, which was more or less by design and closely adhering to target dimensions. Final approach, size-wise, was made by hand plane:

I found that a saw horse is a handy planing beam as the frame can be assembled, or slipped, around it quite easily:

Everyone should have a joined Japanese irregular slope splayed sawhorse for this very reason. :^)
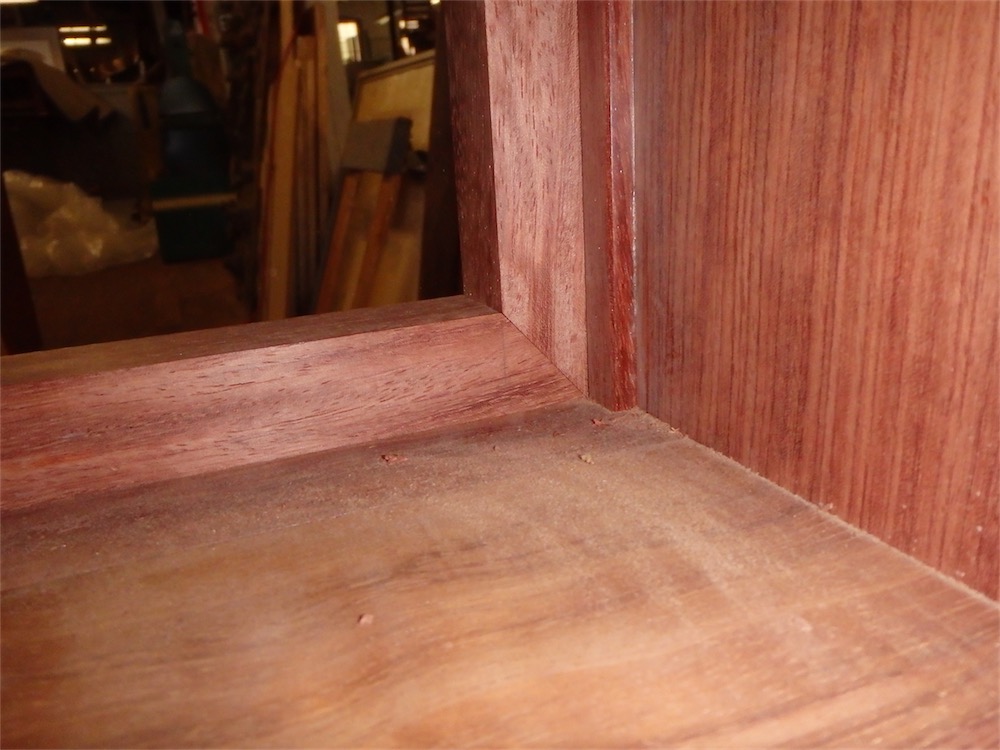
When the frame is in place, I swung around the other side to see how the miter lines were meeting the junction of rebate and infill strip:

Here the upper two panel frames have been fitted to cabinet 1:

The front faces of the frame corners have miters, as mentioned, and I omitted pics last time, so how about one today?:

Otherwise this is a standard sorta haunched mortise and tenon connection:

I will glue these connections, and wedge the tenons.
Cabinet #2 with the three rear frames fitted:

And same then for cabinet #1:

A closer look at a confluence of parts at the back, with the back surfaces of the demountable frame members still, obviously, needing a finish planing:

Another look from inside the cabinet:
Next task was to adjust the panels so as to fit the frames, having left the panel rebating depth a little on the fat side previously:

The panel is just hanging there of its own accord, not a terribly tight fit but not so loose that it would fall out at this juncture.
Next the middle panel is adjusted to fit:

And then the bottom one:

Same process was repeated for cabinet #2.
Once the panels were good to go, I assembled the battens part way onto the panels and then drew up a rail:

Then, by sliding the dovetailed battens forward, I was then able to scribe the mortise location directly on the inside face of the rails:

Said mortise then met its fate at the land ‘o the hollow chisel:

Rebates were also processed on the rails and stiles, the location of the panel dado carefully worked out in advance so as to just fit between tenon and the mitered flap housing:

Time then to put a frame and panel together:

Clamps helped for that last few millimeters:

Next, the stiles slide on, and since the arrangement of tenons and mortise here is reversed to that between battens and rails, a self-locking assembly is realized:

Another view:

One stile in place:

Everything is just dry-fitted for the time-being:

The batten tenons are left long along one side, as they will form part of the mechanism by which the panel assembly is attached to the cabinet carcase:

A view from the front of the first assembled rear upper demountable panel assembly:

The panel is standing in the same orientation as it will reside in the cabinet, and I took care to place the panel such that it’s quartersawn grain figure, which had a slight curvature, bowed upward.
A closer look at one side:

I’ll adjust the gaps between panel and frame later on to some suitable size and evenness.
I’m thinking another shop session should seem me through the completion of the other panel assemblies, and hopefully their fitting to the cabinet carcases. Another day after that to do the panel clips. Once the rear panels are in, I can move on to the final fabrication task on these two cabinets, namely the front doors.
Thanks for visiting the Carpentry Way.
via Tumblr http://davidpires578.tumblr.com/post/152486206489
No comments:
Post a Comment