Well, I’ve been getting a lot more familiar with the Zimmermann in the past couple of days, and it has been a pleasant learning experience for the most part.
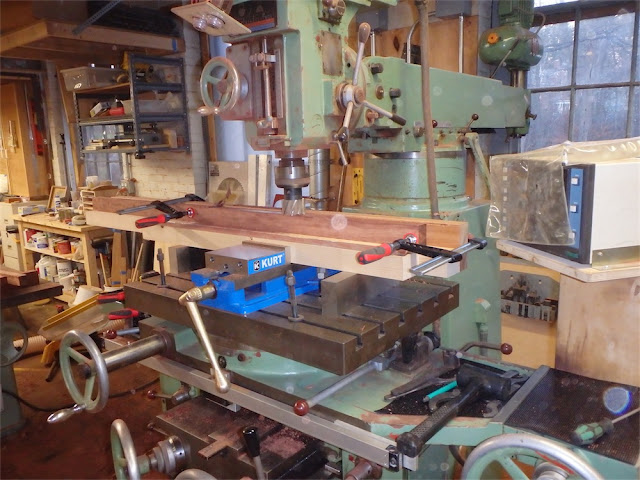
Here’s my Mark II (or is it III?) fixture for milling long stock:
Clean and flat, with no tear out - is it too much to ask? Not any more:
Here are the four inverted ’T’ section beams - crisp arrises and square adjacent faces, and nice and straight - what’s not to like?:
Today the three QS wide bubinga boards showed up via Fedex Freight and interrupted the milling:
Spreading these three boards out revealed a fairly awesome scene:
New to me altogether, in this material, were knots:
I’ll be able to cut out around most of them, and the few that remain behind are not too critical as they will be in the upper and lower carcase boards, which reveal only their edges in the normal viewing positions.
Can’t get much closer to ‘perfect’ stock at 23" wide, almost completely quartersawn:
I did a bunch of cross-cutting to obtain the remaining boards for the upper cabinet carcase, and then it was back to the milling:
The cutter has a positive rake, but it the cutter engagement is still quite a bit steeper than my 60˚ Funahiro plane. What you get, effectively, is rotary scraping with a HSS helical milling tool:
Beats grinding any day.
Gang-cutting was an option with the stock which will become the pillow blocks for the lower stand:
The mill made it relatively straightforward to straighten the stock, and I was able to get close to target dimensions. The pillow block width was set for 2.700":
Before surfacing with the FZ-5V, I had this sort of tear out on the faces after careful machine planing - the closest I could get with planing left tears propagating up to 1mm into the surface:
The rotary scraping however left behind a clean flat and tear out -free surface, which was indeed happy days for me:
Target dimension here was 1.1250" - - if I invested in a bit more metal, I could improve the fixturing yet, and I think achieving +/- of 0.001" to target dimensions is certainly within the realm of possibility:
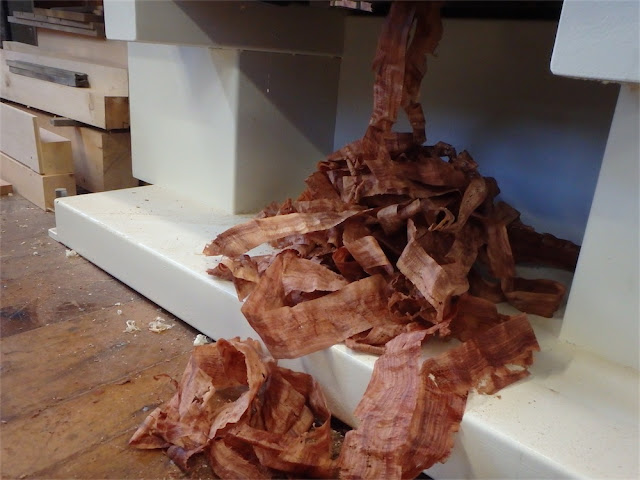
What’s this? More bacon slices crop up under the super surfacer:
Clean surfaces, free of tear out, arrises crisp, and parts are right at the desired dimension. Am I dreaming? I could get used to this:
Another view:
Round 216 of milling begins, with the stretchers (nuki) clamped into the fixture:
Getting the parts to dimension via the milling machine certainly isn’t the fastest process compared to other approaches, but it is a rather certain one. I am so happy to get things down to size without tearing my hair out over tear out. More work remains on the stretchers, and then it will be time to form the legs into parallelogram sections. Feels very achievable and I look forward to seeing how these slight improvements in dimensional accuracy and parts straightness piece to piece translates into ease of assembly when the compound-splayed base comes together. I think the small differences will add up to something significant.
Happy Thanksgiving to my American friends, though in truth my Canadian friends are wondering what took you all so long :^) Thanksgiving is in October, after all.
via Tumblr http://davidpires578.tumblr.com/post/133960968884


No comments:
Post a Comment